Baking techniques

Focaccia: Easier than expected, tastier than you knew

Light-textured, shiny with olive oil, and creamy-flavored, this complex bread only seems complicated to make

  • more
    • All Share Services

Topics: , ,

Focaccia: Easier than expected, tastier than you knew

Updated: Poolish recipe updated to balance weights of flour and water, for aesthetic and poetic reasons. Also, pound-to-ounce conversions are now done for you.

OK, so it’s not true that I’ve never baked before. Despite my fears, I’ve tried at various points to exorcise myself of my dough timidity, and once even scaled the Great Focaccia Mountain and turned out a few decent rounds. They had all the things you’d want in focaccia — a tender, light crumb, a thin pliant crust that crisped with a nudge in the toaster, and a rich flavor of olive oil. It was great, exciting and … totally lost to me after I made it, because I only did it once and tried to sneak away while I was batting 1.000.

But in baking school, kneading my way through literally dozens of loaves of bread, I felt myself growing more comfortable with doughs of all sorts, increasing in difficulty from the 1-2-and-done loaves of Irish brown soda bread to the tough-but-fair mass of bagels to incredibly sticky, challenging gloops that wanted to glue themselves to my hands, my workbench, my neighbor’s hair. Midway through Day 3, by the time we got to the school’s quick, straightforward recipe for focaccia, it felt like a vacation. It turns out that my Great Focaccia Mountain is actually more like a quaint little hill, but who says things need to be hard to be great?

The version of focaccia I’ll share below is every bit as good as the one I described above, but even better, with a complex addition of a mild, creamy tang, a gift from nature. This bread starts with a poolish, aka the evocatively named liquid sponge, a delicious but mannered yeast-and-bacteria colony that’s the midway point between just using straight yeast in your dough and going all-out with a sourdough starter.

What’s a poolish? What’s a liquid sponge? Two terms for the same thing, a poolish is essentially a light, young version of a sourdough starter that’s used to leaven a dough after it’s developed a little bit of flavor but before it starts to get really sour and funky. After 8 hours to a day or so, a poolish gets a milky, buttery characteristic, the result of the friendly bacteria producing lactic acid. I opened my container of the stuff and the aroma was, I thought, of yogurt and almonds. Others in the class thought it smelled like baby spit. I guess I couldn’t disagree, but it tastes great once you bake it!

Use spring water for your starters and doughs, or do it the cheap way — dechlorinate it: Lots of municipal systems spike their water with a little bit of chlorine to kill microorganisms. I’m anti-tummy ache, so I think this is generally a good thing, but it unfortunately also kills many of the yeasts and bacteria we’re trying to cultivate in our starters and doughs. So when making any yeasted bread, spring water is an aristocratic choice. Or simply fill a bowl with the water you need for your recipe and let it sit, uncovered, for about three hours; the chlorine will naturally evaporate out. Note that water filters won’t remove the chlorine, and avoid distilled or reverse osmosis waters, because they have literally no flavor.

Weight vs. volume: This is sort of an age-old battle in recipe writing — do you give ingredient measurements in cups and pints or do you give them by weights? The reason is that density varies; if your flour has been sitting untouched for weeks and mine is constantly getting fluffed up from my dipping into it, a cup of your flour will weigh more, probably, than my own. Usually, you can assume certain averages (about 5 ounces — or .32 pounds — for a cup of all-purpose flour, for example), but in baking precision really matters, especially if you’re making larger batches. (A slight difference in one cup, but multiplied several times, starts to really make a difference.) Weights, however, don’t change — a pound is a pound, a gram is a gram. So while in the past few recipes I’ve given volumes for convenience’s sake, I’ll start here with weights as well. And buy a scale! They’re cheap and totally worth it.

One way to check if you’re done kneading — the windowpane test: Mixing and kneading bread dough in a KitchenAid-type mixer is convenient, but offers the danger of overkneading, which makes the loaf dense and tough. You really don’t have to worry about that when doing it by hand (and I enjoy the physicality of it), but then you have to think about underkneading. (It’s better to underknead than over, if you have to choose.) In a somewhat firm, pleasant dough like this, you can check on your progress with the windowpane test. Using the thumbs and forefingers of both hands, gently pinch and tug a few inches of dough out of the mass. With your middle fingers, gently tap on the flap you’re stretching. Do you feel a tautness, like a drumhead? Does the dough let you stretch it without snapping or tearing right away? It will eventually rip, but if you get some tension in there before it does so while you manipulate it gently, that’s a good sign. And certain doughs will actually stretch to the point of being somewhat see-through, hence the name of this test.

Focaccia
Recipe adapted from Zingerman’s Bakehouse

Ingredients

Poolish

  • 3/4 cup all purpose flour (0.25 pounds — 4 oz)
  • ½ cup water (0.25 pounds — 4 oz)
  • 1/8 teaspoon active instant yeast

Dough

  • 1 cup water (0.50 pounds — 8 oz)
  • 1¼ cups poolish (from above) (0.50 pounds — 8 oz)
  • ½ teaspoon active instant yeast
  • 3 cups all-purpose flour (0.96 pounds — 15 oz)
  • ¼ cup extra virgin olive oil (0.09 pounds — 1.5 oz) plus more, to brush
  • 1½ teaspoons salt (.02 pounds — er, just use the teaspoons!)
  • Extra virgin olive oil, to taste
  • Fresh rosemary, to taste
  • Coarse sea salt, to taste
  • Parmesan cheese, grated, to taste

Directions

Poolish

  1. Combine the flour, water and yeast in a medium mixing bowl and mix together until incorporated.
  2. Cover the bowl loosely with plastic wrap and allow the mix to ferment for 8 hours or overnight. If you see it get super-bubbly and puffy, put it in the fridge.

Dough

  1. In a large bowl, add the water, poolish, olive oil and yeast and combine thoroughly with a wooden spoon.
  2. Add half the flour and stir. The mixture will resemble thick, lumpy pancake batter.
  3. Add the salt and remaining flour, mixing until it looks like a gnarly mop head, the proverbial “shaggy mass.” Turn the dough onto a clean, dry work surface, scraping all the flour and dough bits out.
  4. Knead the dough for 6 to 8 minutes, until the dough looks smooth and somewhat taut. Check the gluten development with the windowpane test, and if it’s looking kind of windowpane-y, you’re good to go.
  5. Scrape all the leftover flour and dry bits out of the mixing bowl and spray or brush the bowl with oil, delicious, delicious, nonstick oil. Put your dough back into the mixing bowl and cover with plastic.
  6. Preheat the oven to 450° degrees with a baking stone on the bottom shelf, and let the dough ferment at room temperature for 1 hour and 15 minutes.
  7. Uncover the dough and turn out onto the work surface. Divide into 2 equal pieces.
  8. Gently form the dough into a disc thusly: Pull up on a corner of the dough and hold it in the center of the mass. Then pull up on the edge of the dough a few inches away from your first corner, bringing it to the center, and pinch it to the bit you’re already holding. Continue all the way around the dough until you have a little purse-shaped cutie. Smack it down lightly to flatten the dough into a disc shape. (Don’t smash it — just pat it into shape.) Flip the focaccia, pinched-seam side down onto a piece of cornmeal-dusted parchment and cover with plastic. Let rest for 45 to 50 minutes.
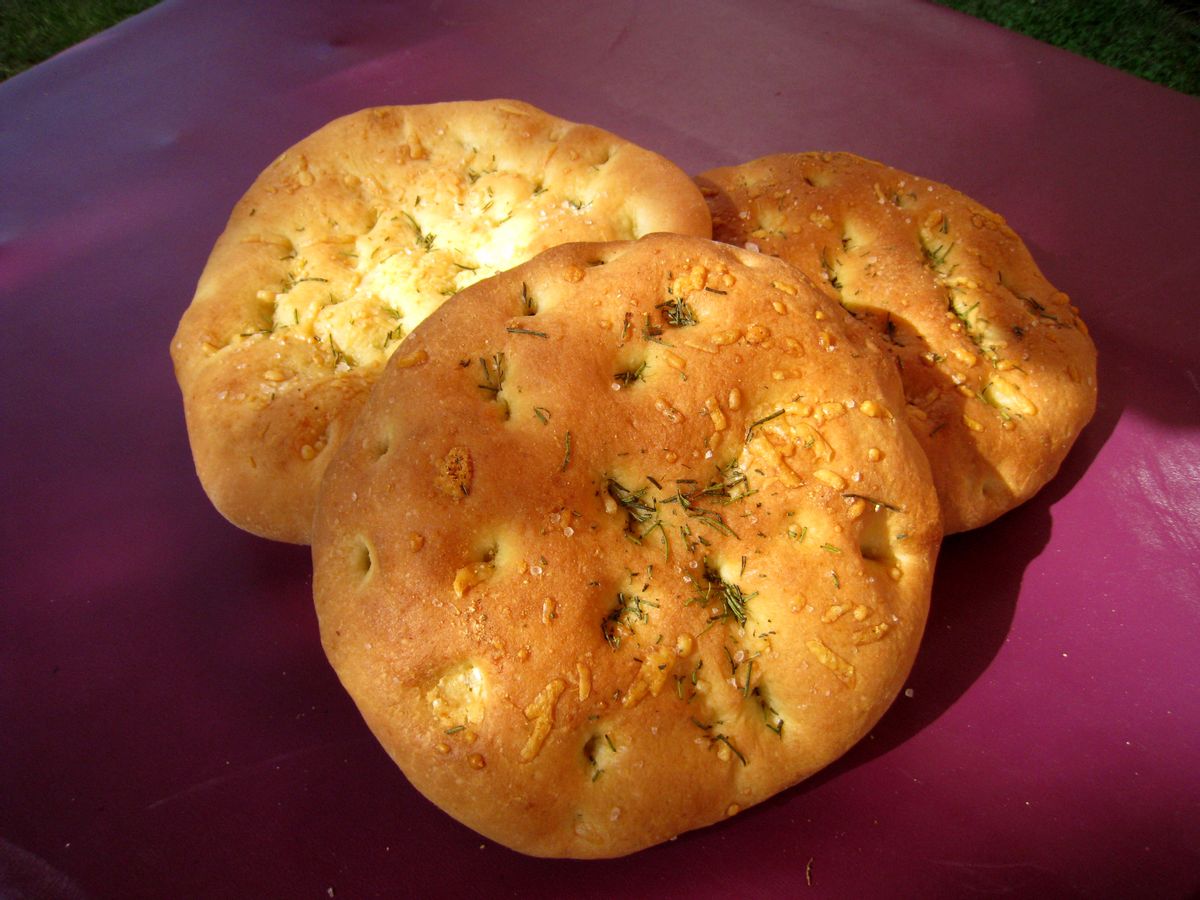
  9. If you have a peel, sprinkle it lightly with cornmeal and place the disc onto it. (If not, leave it on the parchment, but maybe on the back of a sheet pan or cookie tray to help you push it onto the baking stone.), With your fingertips, press the disc almost all the way through to make dimples all over the surface, then brush the top of the dough with olive oil and sprinkle with coarse sea salt and Parmesan. (I like to sprinkle lightly, but it’s your call.)
  10. Slide the focaccia onto the preheated baking stone and bake for 15 to 20 minutes, until golden brown.
  11. Remove from the oven and cool on a wire rack, brush again with olive oil and sprinkle with fresh rosemary. Cool completely before eating. It will be tempting to break into it, but really: wait. The rosemary infuses into the olive oil and then sinks into dimples, and the bread needs time to finish cooking and setting up so that it’s not gummy. If you like it warm, feel free to reheat it after it’s cooled down.


Continue Reading Close

Francis Lam is Features Editor at Gilt Taste, provides color commentary for the Cooking Channel show Food(ography), and tweets at @francis_lam.

Seriously good heart-healthy apple pie

Don't laugh! Here are the secrets to a state-fair-winning crust with essentially no saturated fat

  • more
    • All Share Services

Topics: , ,

Seriously good heart-healthy apple pie

After heart problems forced me to stop eating saturated and trans fats, I thought I would never make or eat pie again (and believe me, I cried myself to sleep over that one). Then I saw a crust recipe in Saveur made with white flour, vegetable oil and whole milk. The old Cathy would have scoffed at this idea, but I had to give it a try – especially considering that a pie with this crust won the Iowa State Fair pie contest!

I gave the recipe a bit of a health makeover by using half whole wheat pastry flour, plus organic canola oil and fat-free milk. The result was shockingly good, and I was a Pie Queen once again. Not a good thing for my waistline, but great for my happiness level.

Don’t be skeptical, you butter lovers. This crust is so tender and flavorful, people will shake their heads in disbelief when you tell them it’s made with oil. My mother-in-law proclaimed it as good as her grandmother’s lard crust, and that’s about the highest compliment I could receive. A few people who commented on the Saveur site had problems with the crust, but I think it’s nearly foolproof if you follow my instructions and these three rules of thumb:

1. Measure everything accurately. A tablespoon means right to the top of the measuring spoon!

2. Measure the flour by spooning it gently into your measuring cup rather than scooping, then level off with a knife.

3. Never refrigerate the dough.

Heart-Healthy Apple Raspberry Pie

Ingredients

Filling

  • 5 cups peeled, thinly sliced apples (about 5 apples)
  • 1 tablespoon lemon juice
  • 1/8 teaspoon cinnamon
  • 1/8 teaspoon freshly ground nutmeg
  • 2/3 cup sugar
  • 3 tablespoons cornstarch
  • 2 1/2 cups fresh raspberries (about 12 ounces)

Crust

  • 2 2/3 cups flour, half all purpose and half whole wheat pastry flour
  • 1 teaspoon salt
  • 2/3 cup organic canola oil or high-oleic safflower oil
  • 6 tablespoons fat-free milk
  • 1 teaspoon milk and 1 teaspoon sugar, for brushing top crust

Directions

  1. Preheat your oven to 400 degrees.
  2. Combine the apples, lemon juice, spices, sugar and corn starch in a large bowl, then gently fold in the raspberries.
  3. Whisk the flour and salt in a medium mixing bowl. Pour the oil in a glass measuring cup and add the milk, without stirring. Pour this mixture into the flour and stir briefly, just until combined. Divide the dough in half and form two balls.
  4. Place a 15″ long piece of wax paper on your work surface, putting a few drops of water under the paper to keep it from sliding around. Put one ball on the paper and press it into a 6-inch circle. Top with another piece of wax paper and roll it out with a rolling pin to a 12-inch circle (the edges may extend beyond the top and bottom of the wax paper slightly, but you can loosen it with a knife when you lift the dough.) If your circle is uneven, simply tear off a piece from one part and add it to another – it’s easy to make repairs.
  5. Remove the top sheet and turn the dough over into a 9-inch pie pan, pressing to remove any air pockets. Pour in the filling. Roll out the second disc between fresh wax paper and place it on top of the pie. Fold the top crust under the bottom all the way around, and crimp the edges. Cut some slits in the top, then brush very lightly with milk and sprinkle on a little sugar.
  6. Bake at 400 degrees for 10 minutes, then reduce the heat to 350 and bake about 45-50 minutes, until the crust is lightly golden and the filling is bubbling. Cool 3 or more hours before serving.
Continue Reading Close

Supercharge your oven, and answers to your bread questions

How to get pro-level performance from a home appliance, the secret to crusts, and more answers to your queries

  • more
    • All Share Services

Topics: , ,

Supercharge your oven, and answers to your bread questionsBaking guru Shelby Kibler

Corrected: Comments I originally made about spelt having no gluten were wrong. Now they’re more right.

The word “amateur” means, literally, “one who loves,” and after four days of bread school, I am officially an amateur baker. Such heights I aspire to! But it’s funny, looking now at my reports from bread camp, that the recipes I’ve shared haven’t required me to touch on two of the most important lessons I learned there: the importance of wet, sticky, this-can’t-be-right-looking doughs and how to get commercial-oven-type results from your home oven. (I also haven’t gotten into naturally leavened sourdough breads, which is a major component of most serious bakeries. Unfortunately, those tend to be proprietary recipes, and to get it right, you have to go into greater detail than we have room for here. Great books like “Bread” by Jeffery Hamelman are a great way to get started on those, though.)

Happily, many of your questions touched on these themes, so I’ll address them — to the best of my ability — below.

Don’t flour your board: OK, that’s an overstatement. Sometimes it’s necessary to lay down a little flour when you’re working with dough — when you’re folding it or shaping it, for instance. But resist the strong temptation to flour your board so that the dough doesn’t stick while you’re kneading it. Wet dough makes good bread — it keeps the crust crisper and the insides more tender, more chewy, more airy. Adding flour to your board while kneading works that flour into the recipe, and it’s a slippery slope — once you’re used to a nice, dry, easy-to-handle dough, you’ll only want to keep it that way … and the bread will suffer for your convenience.

How to knead wet, sticky dough: OK, so you’re resisting the urge to flour your board, and what are you rewarded with? A dough that’s like glue, sticking and smearing all over the place. Thanks a lot, Lam! But you can get used to kneading this sort of thing. (Of course, you can do it in a mixer, but what’s the fun in that?) First, make sure you start with clean hands – if there’s dough stuck to them from turning it out from the mixing bowl to your table, it’s just going to want to stick to itself. Keep a bench knife or dough scraper in one hand (most people prefer it in their dominant hand). With the base of your tool-free hand, and with a quick motion, push into the dough to stretch it. (Quick, confident motions help keep the dough from sticking to you.) Then, with the scraper, get underneath the dough and fold it on itself before giving it another push. (Also try to do this in quick, confident motions.) Come at it again with the scraper, from another angle, maybe a quarter-turn from where you folded it last. Push into it again. Repeat this combination, varying the angle from which you scrape and fold the dough, and every third or fourth scrape, come all the way around it to make sure you’re gathering up all the dough on the table. Eventually, you’ll develop enough gluten in the mass to help firm it up, and it won’t be quite so blobby.

Now, to the questions:


Supercharging your home oven — getting better heat and creating steam for better texture and crisper crusts

My friend bakes her bread on a large round stone. What difference would baking bread on a big hunk of stone make? — Adrienne S.

One thing I really love is CRUSTY bread. Thick, hard, exercise-your-jaw crusty. I will rip out the doughy innards in order to be left with just crust. So my question is, HOW do I do that? — catnmus

I have been having problems with several tried-and-true bread recipes since I moved into my apartment with a much smaller electric oven. The bread tastes fine, but the crusts are almost impenetrable. Any suggestions are welcome. — Denise K.

The two main differences between a commercial and home oven are heat and steam, but there are ways to level the playing field on both.

Big bad pro ovens just get hotter and, more important, hold their heat more tenaciously. A home oven can lose as much as 50 degrees when you open the door to take a peek. But a baking stone, when preheated for long enough, will actually hold a good deal of heat and “donate” it back to the oven, keeping the temperature more consistent. And, if you bake directly on the stone, the intense heat will give a richly caramelized bottom crust. More magically, it also gives a better rise. When dough — all full of yeasts and puffy with the carbon dioxide they produce — hits a hot oven, the yeasts get excited and start wheezing out more and more CO2. The gas gets more active and tries to push out of the dough, expanding it while the dough is cooking and setting into shape. This “oven spring” makes your bread light and tender and delicious. So a baking stone helps with all that.

As for the crust, there are many reasons why your crust may or may not be fantastic, but one major one goes back to the idea of balancing the relationship between the bread expanding and at the same time wanting to set its shape in the oven. Commercial ovens have the ability to inject steam into the baking chamber during the first 6-10 minutes of the bake; it’s in this time that the yeast and gas are most active, and you want to keep the crust from firming up while it’s moving. So steam helps to keep the outside of the bread pliable. At the same time, it gelatinizes the starch on the crust, so that it will crisp up later in the cooking process.

There are lots of ways to create steam in a home oven, but one that seems to work best requires a well-heated heavy pan (like cast iron) on the floor of your oven. Position the pan so it sticks out from under the baking stone by a few inches. Spritz the inside of a big metal mixing bowl or a disposable lasagna tray with water. Put your bread on the baking stone and cover the entire loaf with the bowl, hanging it over the stone by a couple inches so that there’s a direct line from the hot pan to the bowl. Carefully but confidently pour about ½ cup to a cup of boiling water into the pan and shut the door. The water will create a burst of steam as it hits the hot pan, and the steam will go up around the stone and into the little chamber created by the bowl. (Just be sure to pour the water surely with an outstretched arm so the steam doesn’t attack you.) After 6-10 minutes, remove the bowl (careful!) and let it finish baking.

If you have an electric oven, you can actually throw the water right on the floor of the oven, and just open the door 6-10 minutes into the baking time to let the steam escape. (This doesn’t work in gas ovens because they have flues.)

Finally, there can be many reasons for crusts that are too thick as well. Adding steam may help, since it retards the crust’s setting and browning process. Turning up the heat (or using an oven thermometer to make sure the heat is accurate) may also help, since baking a loaf too slowly will give more time for the outside of the bread to dry out and become thick. Or it may simply be over-baked, or the dough allowed to proof without being covered with plastic or a moist towel, forming a dry skin even before it goes in the oven.


Yeast in the hot, humid summer, and how to check if your dough is properly risen

How sensitive is bread dough to high summer humidity? I live in coastal Mississippi. All my bread comes out a bit “homemade,” in that distressingly dense-but-dry way. Do I just throw in extra yeast? — KZ

If it’s really hot and humid, you can actually cut back on the yeast you use, because it will multiply so quickly in those conditions. If you decide to stay true, quantity-wise, to a recipe written for room temperature (and 99.99 percent are), be sure to keep a good eye on your dough as it rises. If it starts to bubble up and lift quickly, and is looking like it might collapse, then move on to the next step of the recipe, or put the dough in the fridge to retard the yeasts’ action. An overproofed, collapsed dough will make for dense, dry bread.

Another way to help mediate the temperature is to use cold water for the dough and instant yeast, which doesn’t need warm water to activate. Or even go so far as to refrigerate your flour for a bit as well, so the dough doesn’t start out hot.

A test you can use to see if a loaf is properly proofed and ready for baking is to poke a finger about a half-inch into the formed and shaped loaf. If it doesn’t collapse the dough, you feel a little bit of resistance, and the indentation pops back out maybe 1/3 of the way you pushed it in, you’re ready to bake. If it bounces back all the way, you may want to let it continue to proof. Of if it collapses or doesn’t come back out at all, the bread might be overproofed.


Some questions on sourdough starters

1) I have always been led to believe that they will die if you don’t take them out and feed them every couple of weeks. However, I have neglected my starter (in the fridge) for months at a time without any negative effects. So, what are the limits? I believe that yeast forms spores in times of deprivation, so it seems like it should be essentially impossible to kill a starter with neglect. As I recall, the “wake-up” time (the time it takes after adding flour and water before bubbles start to form) was longer when I hadn’t used the starter in a while, but other than that there were no problems.

2) Any info on whole wheat versus “white” flour in starters? I like to give mine whole wheat every now and again, just so it has a bit of variety in its diet (anthropomorphizing one’s starter is an indispensable part of owning one).

3) I’ve also read that metal utensils and bowls are bad for the starter (since it generates acid, which can dissolve some metals). However, most metal bowls for the kitchen are stainless steel, which ought to be nonreactive. Is stainless steel OK?

4) I’ve noticed that my sourdough rises better (more evenly, not more quickly) at room temperature, whereas when I use commercial yeast it is better to incubate the dough in a warm (90-100º F) spot. My working theory is that since it spends most of its time in the fridge, my starter’s yeast population is better adapted for colder conditions whereas commercial yeasts have been optimized for the higher temperatures that most recipes call for. Is this true? — -Pentiptycene

Wow. OK, here goes:

1) I believe you had a liquid starter, that is, a starter with a much higher percentage of water than a firm or solid starter, which is basically a literal piece of sour dough. I’m not sure of the science behind this, but yes, liquid starters can stay viable for much longer than firm starters and can take all kinds of neglect and abuse, though “months” I would think is pushing it. Two weeks is about as long as you really want to go between feedings, but the thing with more frequent, even daily, feedings (whenever it gets frothy and bubbly) is that they will help to develop a much more mature, complex-tasting starter in a much shorter time. Some say that a liquid starter will never develop as complex a flavor as a firm one, but for an occasional home baker, a liquid starter is a great thing to have for convenience’s sake. It has great survival skills, but it will flourish if you take regular care of it.

2) OK, well, you better have a name for your starter then. And whole wheat is fine.

3) Yes, stainless steel is nonreactive and OK. You might want to avoid aluminum, though.

4) Hm. No idea. It must be intelligent design!


Finally, some unsatisfying answers to a few miscellaneous questions

Ask Shelby what he thinks about “Artisan Bread in Five Minutes a Day.” I started baking bread last year with this book, but I’ve read enough online to recognize its limitations. Where do I go to get to the next stage? — Ryan K.

Well, I asked, and while he’s familiar with that book, he hasn’t actually read it and so can’t comment on it. But one should never limit oneself to one source, and two books he really recommends are “Bread” by Jeffery Hamelman and “Bread Science” by Emily Buehler.

Hope you will find out how different flours affect the finished product, such as whole wheat, soy, oat, buckwheat and spelt. Can you make a buckwheat bread? Anyhow, I have access to all of these flours and would love to experiment once the heat of the summer is behind us. — Trace element

Well, this is a huge question, and I’m sorry I didn’t find any good answers! Whole wheat will certainly add flavor to a dough, but will also absorb more moisture, so the dough and bread may end up drier or a little denser than if made with white flour. It also kneads a bit differently, as the bran and germ will actually inhibit some gluten formation (they will physically cut the gluten strands as they form), giving you a little less rise and less chewiness. But obviously there are incredibly delicious whole wheat breads; you just have to factor in those traits.

Aside from spelt, the other flours you mention don’t have any gluten at all (though oat and buckwheat flour are sometimes contaminated with wheat in processing), so they will have a very different texture. A great source to start your research is “Gluten Free Baking” by Richard Coppedge, a certified master baker and an instructor at the Culinary Institute of America. 

Continue Reading Close

Francis Lam is Features Editor at Gilt Taste, provides color commentary for the Cooking Channel show Food(ography), and tweets at @francis_lam.

Defend the bagel’s honor: Make your own!

Learn to knead, shape and bake to help one of the world's great breads fight back against puffy imposters

  • more
    • All Share Services

Topics: , ,

Defend the bagel's honor: Make your own!True, honorable bagels

Just because something is round and made of bread doesn’t make it a bagel. I should know; I grew up among true bagel eaters. Also, I am Chinese, and since all my Jewish friends accord the cuisine of my people the utmost respect, it’s only right that I fight for the honor of their bread. A true bagel is not the size of a saucer. It is not puffy. It should have an actual, distinct hole. It must have a crust you have to actively try to tear apart, and it has to be chewy, a workout for your jaw (in a good way). On the matter of the inclusion of cinnamon and raisins, I am officially against. (Unofficially, I eat them like doughnuts. Shh.)

But the world does not respect the integrity of the bagel. Nay, the ubiquity of the sucky bagel can no longer be ignored: big, puffy, dry, characterless, insipid, stupid, ignorant, offensive, socially maladjusted circle-shaped breads called bagels exist in every supermarket freezer aisle, in every corner deli. They besmirch the bagel’s good name.

Happily, my baker friend Shelby once set his mind to creating the very best bagel he could, and because this is a man who once drove across the entire country without a radio in his car because he set his mind to it, he came up with a killer recipe, full of firm chew, a crust with self-respect, and a subtly sweet, wheaty flavor. Even more happily, these bagels also represent a fine lesson in key baking skills, so even if you’re not going to join the bagel resistance, they’re still worth making to learn techniques in mixing, kneading, proofing and baking. (If you know all this stuff, feel free to skip to the recipe, but it was all news to me.)

What is a straight dough, and the best kind of yeast to buy: While the soda bread we learned about last time is a chemically raised quick bread, bagels are in the straight dough family, which is to say doughs that are leavened through the use of commercial yeast. One of the reasons I’ve always avoided bread making is having to deal with proofing yeast, activating it with water that’s warm but not too hot, so they come alive but are not killed by the heat. It all seemed a hassle. Happily, instant yeast (aka bread machine yeast, quick yeast or yeast with some reference to its speed) is made so that it dissolves quickly and works fine in cold and room-temperature water, so there’s no need to fuss with a thermometer.

Standard mixing technique: In the recipe below, you’ll see that the dry and liquid ingredients, minus the flour and the salt, are mixed together first. Then you add half the flour and mix some more, then the rest of it with the salt. This is the standard technique for mixing together doughs, and it works nicely because it allows for the dry and wet ingredients to mix and dissolve evenly before the thirsty flour shows up and hogs all the water. Adding half the flour at a time also allows for more even hydration of the flour, and it also provides the yeast with a bit of protection from the salt, which scares poor yeast to death. (Salt actually does slow down yeast’s activity, which is important in all kinds of ways for bread.)

Kneading stiffer doughs: People develop their own moves for kneading dough, but the three things to keep in mind are that you want to keep stretching, folding and rotating the dough. It’s really not about pressing into it hard or beating it up. The technique Shelby taught me, which works really nicely for this and other doughs that aren’t super wet or sticky, is to stand at the table with one foot slightly forward. In this stance, you can rock your body weight back and forth to give you force and rhythm and keep your arms from tiring out. Using your body weight, push forward on the dough with the heels of your hands, pushing it down into the table only as firmly as you need to make sure it’s stretching the dough forward somewhat. Then, as you rock back, use one hand to pick up the top of the dough to fold or roll it down back over itself. Use your other hand to give it a quarter turn at the same time, so that your next push forward into the dough is in the same location and direction on the table, but you’re effectively working a different area of the dough itself.

Retarding: Fermentation in the dough, which is what gives us rising, happens slowly when the room is cool and quickly when it’s warm. Knowing this, it’s possible to prepare a dough up to almost any stage and put it on hold until you’re ready to come back to it by putting it in the fridge, which will nearly stop the fermentation process. This is called retarding. (Just make sure you cover the dough with plastic so it doesn’t dry out.) The recipe below is great to make all the way to the point where you’re ready to boil and bake the bagels, pop the dough the fridge overnight, and have them ready to cook fresh for breakfast. (OK, probably it’ll be more like brunch.)

The importance of the baking stone: One of the two major differences in professional and home ovens is that the big boys get much hotter and stay hotter; they don’t lose all their heat when the door is opened, making the baking process wonky at home. (Even a quickish peek into a home oven can cost you 50 degrees.) But a good-quality baking stone (also called a pizza stone) can go a long way toward equalizing the two if you let it preheat for a good long time; it slowly builds up heat in itself, and so even if the hot air escapes your oven, it will “donate” its heat to rewarm the air much more quickly. And its intense heat helps give breads baked directly on it a great crust. Put your stone on the bottom rack of the oven (not the floor of the oven), and just make sure you get a nice thick one, ¾ of an inch or so; the thinner ones you get for about $20 have a nasty habit of cracking.

True, honorable bagels

Recipe courtesy of and adapted from Shelby Kibler and Zingerman’s Bakehouse

Makes 16

Ingredients

  • 2¾ cups water
  • ¼ cup plus 1 tablespoon barley malt
  • 1 tablespoon Demerara (sugar in the raw)
  • 1 teaspoon instant yeast
  • 8¼ cups King Arthur brand all-purpose flour; if you don’t have that brand, use another brand of bread flour
  • 1 tablespoon salt

Directions

  1. In a large mixing bowl, add the water, barley malt, Demerara and yeast and stir together with a wooden spoon. Add half the flour and mix to incorporate the ingredients. This should be a thick batter, and don’t worry about lumps.
  2. Add the remaining flour and salt and incorporate the ingredients together until the dough is a “shaggy mass,” bakers’ terminology for a dough that’s starting to come together but has loose and dry bits falling off it and looks a bit like a rock star’s head.
  3. Empty the bowl onto a clean, dry work surface. Don’t worry about loose flour and partially mixed bits, these will work in as you knead the dough — what you’re actually doing in the initial stages of kneading is forcing the water to move through the flour itself, hydrating the dry particles hiding among the moistened ones.
  4. Once the dough is evenly hydrated, knead the dough for 8 to 10 minutes. It’s a pretty stiff dough, so this is going to be a workout. No one said joining the bagel resistance would be easy! Put on some music you like and don’t forget to rock (as in back and forth, not like guitar-bass-drums, though that is always recommended).
  5. At the end of 8 to 10minutes, if your dough is nice and smooth and elastic, form it into a ball and put it in into a container that’s sprayed with nonstick spray or lightly oiled. Cover with plastic wrap and let it ferment for 1 hour at room temperature (70-ish degrees).
  6. If you’d like to bake the bagels as soon as they’re ready (as opposed to retarding them in the fridge for the morning, etc.), preheat your oven now to 475 with the baking stone — the stone needs to sit in the 475 oven for an hour to be ready.
  7. After an hour, have a large sheet of plastic ready (a cut-open grocery bag works great; plastic wrap is too clingy). Divide the dough into 16 pieces (I like to quarter the ball and then cut each quarter into 4 wedges) and set aside covered with plastic.
  8. Take the thinner end of a wedge of dough and fold it in on itself, so the wedge becomes rectangular. Roll it out on the table, starting with one hand in the middle, joining with the other hand, and rolling it outward. Roll it into a cylinder 8 to 10 inches long, leaving the ends a bit bulgier than the rest. Apparently the word “bagel” is related to the word “bangle.” So now you’ll give the name some meaning and bejewel yourself with it. Hang a dough strand over your hand, in the crook of your thumb, so that one of the bulging end is in your palm. Wrap the strand around your hand, and overlap the other end by 2 inches, so you have a wad of dough in your palm. Put your hand on the board and firmly roll the two ends together, joining them into a circle. Place under the plastic and repeat with the rest. Look! You’re making bagels!
  9. When the bagels are all shaped, place them on a lightly floured board or tray, cover loosely with plastic wrap, and let them ferment for 1 hour. (Once they’ve fermented, this is a great point to put them in the fridge until the next morning if you’d like to serve them fresh for breakfast. Just make sure you preheat the oven in step 6 above.)
  10. Bring a big pot of water to a boil, then turn down to a simmer. Boil a few bagels at a time, taking them out of the water with a slotted spoon about 10 seconds after they float (this should only take a few seconds). Place the boiled bagels on a tray until they’re all ready. (If you’d like toppings like poppy or sesame seeds or coarse salt, set up some bowls filled with them and dip the wet bagels into them.)
  11. Assuming you don’t have the traditional jute-fabric baking boards, set the bagels on a lightly oiled sheet tray and bake the tray directly on the baking stone for 21 to 25 minutes or until golden brown. (If you do have the jute boards, I’m going to assume you know how to use them, fancy-pants!) Remove from the oven and cool completely on a cooling rack.

These bagels are really at their best within the first couple of hours after they’ve cooled, and they’ll remain good for 6 to 8 hours or so. After that, they’re better toasted or put in the freezer.

Continue Reading Close

Francis Lam is Features Editor at Gilt Taste, provides color commentary for the Cooking Channel show Food(ography), and tweets at @francis_lam.

A quick bread to cure baking phobias

A super-easy, shockingly delicious Irish brown soda bread teaches essential skills and builds a novice's confidence

  • more
    • All Share Services

Topics: , ,

A quick bread to cure baking phobias

I’ve always said that I’m a cook, not a baker, and my insistence on it is for several good reasons and one really bad one. I’m disorganized and impatient, and I overlook details. But the real problem is that I’m also intimidated, fearful of all the ways I might screw up a dough and not know it until I pull wonky bread out of the oven. I’m afraid of the unknown.

But there are reasons to overcome this petty fear: Baking is totally sweet. It’s chemistry and biology and craft and art. It’s making flour and water come alive with yeast. It’s a meditation with your hands, and it’s so beautifully physical. Much of serious cooking is athletic, but on my first day of baking school, I watched a small woman work a 20-foot-deep oven with great power, pushing and pulling loaves with a peel twice her height, making it fly, and it was like watching an event at a track meet. It was mesmerizing, and before it was time to leave she looked to me like St. George lancing a dragon.

So step 1 in joining this crazy brotherhood of bakers is getting over the fear of the unknown; it’s getting a few easy wins under the belt to develop a little confidence. And the first lesson in baking school, quick breads, was meant to do just that.

Quick breads are breads that are made with chemical leaveners — baking soda or baking powder — and, because they can go from raw flour to delicious food in minutes, you usually come across them on the breakfast table: biscuits, muffins, even pancakes and waffles, technically. But for bake-phobics, their ease and quickness are also important because you can reliably turn out superb products in a hurry, giving you an inkling of your hidden talents. “Hey, why not me?” I said, looking at my loaf of gorgeously browned, sweet-smelling Irish soda bread.

I know, I know — Irish brown bread is not everyone’s idea of a great time, dense and with a harsh metallic taste in bad versions. But the recipe I’ll share with you below is really striking, especially if you’re an unbeliever: full of nutty, toasty flavor, an undercurrent of sweetness, and a tender crumb that doesn’t need butter, but definitely wouldn’t kick it out of bed either. It’s fantastic with dinner or on its own.

While making it or any other quick bread, here are some key tips to keep in mind:

Don’t overmix: Unlike other styles of bread, baking soda- or baking powder-raised breads really don’t want to be mixed very much once you add the liquid to the dry ingredients. Follow the particular recipe, but usually just enough agitation to get the dry ingredients moistened is enough, and leaving a few lumps floating around is usually OK. A light hand keeps the final product tender; an overmixed batter makes it dull, dense and tough.

Have your oven preheated and be ready to bake immediately after mixing: Bread rises when gas builds up inside it, trying to escape the dough (heat causes the gas to try to escape with even more force, so it puffs the bread even more while baking). In a quick bread, that gas is the carbon dioxide that is released once an acidic ingredient hits the baking soda (or water hits the baking powder). The reaction is instant, so if you leave the batter or dough sitting around unbaked after it’s mixed, sooner or later it’s going to run out of gas.

The difference between baking soda and baking powder: Baking soda reacts with acidic ingredients (lemon juice, vinegar, yogurt, buttermilk, etc.) to release carbon dioxide, which will lift and raise dough. Baking powder is mostly baking soda, but combined with a powdered acid — cream of tartar. When it gets wet, the baking soda and the acid combine and react to one another, so there’s no need for an acidic ingredient in the recipe. Note that both of these leaveners will eventually lose their effectiveness as they sit in your pantry. To check if your stash still works, add some lemon juice or vinegar to a bit of baking soda, or some water to a sample of baking powder. If they bubble and fizz, they’ve still got some power.

An imperfect but reasonable substitute for buttermilk: When you see buttermilk in a quick bread recipe, it’s usually there to react with baking soda. If you don’t happen to have buttermilk, you can make a functional substitute by stirring one tablespoon of lemon juice or vinegar to a cup of milk and letting it sit for a few minutes. Substitute this mixture in equal amounts with the buttermilk. The flavor won’t be quite the same, but it’ll do what you need it to do. 

Irish Brown Soda Bread

Makes two 1.5 pound loaves

Recipe courtesy of and adapted from Zingerman’s Bakehouse

Ingredients

  • 4 cups whole wheat flour
  • 1 cup all-purpose flour
  • 1/3 cup Macroom or steel cut oatmeal
  • 1 teaspoon baking soda
  • 1½ teaspoons salt
  • 2 tablespoons brown sugar (preferably muscovado sugar)
  • ¼ cup butter, room temperature
  • 1 egg (large)
  • 2¾ cups buttermilk

Directions

  1. Preheat oven to 425°.
  2. In a large mixing bowl, place the whole-wheat flour, all purpose flour, oatmeal, baking soda and salt. Rub brown sugar between your fingers to crumble (if it’s clumpy) into the bowl and mix to combine.
  3. Add the butter. Using your hands or fingers, rub the butter together with the dry ingredients until well blended. Push out a nice divot, maybe 4 inches across and deep enough to see the bottom of the bowl, in the center of the now-buttery mixture (this is called “making a well”) and set aside.
  4. In a separate container, combine the egg and buttermilk with a fork until well blended.
  5. Pour the buttermilk/egg mixture into the well. Using a fork, blend the dry ingredients into the wet. (My preferred method is to use the fork and bring in the dry ingredients from the side of the bowl while rotating the whole bowl with the other hand.) Keep mixing until the whole mixture is moist, with some straggly, shaggy bits.
  6. Using either the palm of your hand or a plastic dough scraper (available for like $2 at baking supply shops), gently fold and knead the mass in the bowl to bring all the dry or shaggy bits together into a uniform dough. Do this by scooping underneath the dough and folding it on itself, pressing down gently to somewhat flatten it back out. Do this while slowly turning the bowl, and the dough will automatically rotate a quarter-turn in between kneads. Knead just enough to bring the dough all together, but no more than eight times.
  7. Turn the dough onto the work surface and divide it into 2 even pieces.
  8. Lightly flour the work surface and pat the dough with your hands to shape it into rounds. Place the rounds onto a parchment lined sheet tray and, with a knife or metal bench scraper cut an “X” into the tops of each loaf, cutting nearly to the bottom. (The cuts will allow steam to escape and will help the bread rise in the oven.) Feel free to give a few lighter slashes in the four quadrants shaped by the X.
  9. Bake the loaves at 425° for 35 to 45 minutes or until the loaf has taken on a deep golden brown color. (Another test is to thump the loaf on the bottom with a finger; it should sound hollow when it’s done.)
  10. Remove from the oven and cool to near room temperature before cutting and eating.
Continue Reading Close

Francis Lam is Features Editor at Gilt Taste, provides color commentary for the Cooking Channel show Food(ography), and tweets at @francis_lam.