Kitchen Challenge

Grilled cheese and tomato soup, with Andy Warhol

My 15 minutes were more like seconds, the moments I spent in elevators with the famous artist

  • more
    • All Share Services

Grilled cheese and tomato soup, with Andy Warhol

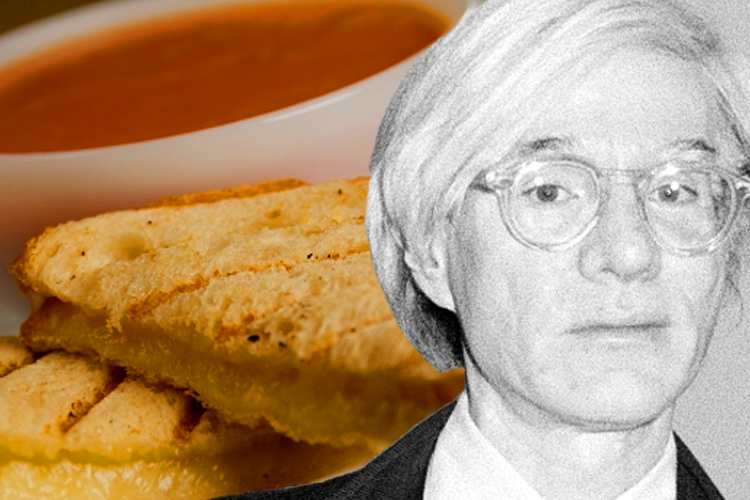
To just imagine the words “grilled cheese” is to be 5 again, sitting at our Danish modern dining table, swinging my pudgy legs from the too-high chair, with a cup of Campbell’s tomato soup steaming in front of me, about to bite into a buttery grilled triangle of Pepperidge Farm white bread oozing with bright orange American cheese. For some reason, my mother never served one without the other.

It was the middle of the ’60s and only just now did I connect the dots between the iconic soup can my mother would have opened to feed me lunch and her life away from our apartment as an artist in a studio one floor down from Andy Warhol’s Factory. We would ride the elevator sometimes with the polite young man with the graying hair and his glamorous pals in their patent leather boots and fishnet tights. One day my mother came home shaking. She had been there when the polite young man was whisked away in an ambulance after being shot in the stomach by “a woman”!

Years later when Andy had recovered, he still needed to wear a medical corset under his shirt to “keep things together.” His hair had turned white (though he often wore a silver wig that was mistaken for his own hair), and by then I knew who he was. I would see him on occasion at the various clubs my friends and I would frequent as 20-somethings trying rather hopelessly to inhabit our time as dramatically as he had his.

But it was the ’80s and the flashy, ebullient promise of the ’60s had turned darker and edgier. Instead of the frail and ethereal beauty of Edie Sedgwick and Twiggy, we had the leather-clad Ramones and Debby Harry in a ripped T-shirt to emulate. We wore safety pins on the outsides of our clothes and clomped around in boots with too many buckles.

Andy showed up late one night to a club, his spiky mop of hair a beacon amid the sea of black shirts and skinny jeans of his entourage. A girl I knew was with him. She had just written a book and was a momentary media darling. “Hey,” I said. She pretended she didn’t know me. I wanted to scream at her, “I fed your cat when you were in rehab!” She had been my next-door neighbor for a year and for countless nights I had listened to her crying jags through the thin wall that separated our bathrooms. “They hate me!” she would wail and sometimes glass would shatter.

Andy was taking pictures with a Polaroid camera and his friends would shake the developing images after they spit out. Before I turned away, I stared and took my own mental picture of him, not imagining that a few years later he would be gone. It is filed away next to that other mental picture I have of a little girl, years away from black clothes and ugly boots, happily soothed by a cup of soup from a famous can and a delicious brightly colored sandwich.

Basic Grilled Cheese Sandwich

There are a few tricks to making a good grilled cheese sandwich, no matter what kind of bread or what kind of cheese you choose. Instead of melting butter in the pan, I always slather one side of the bread with room temperature butter before grilling. I always heat the pan before I start to grill. If you are adding any condiments like mustard, chutney or savory jam, spread them on the unbuttered side of a piece of bread before you put the cheese on. If you are adding anything else such as greens, tomatoes or bacon, add them after the cheese has started to melt and before you top them with the second piece of bread. Lastly, grated cheese melts more evenly than sliced cheese.

Makes 2 sandwiches

Ingredients

  • 4 slices bread
  • 4 ounces good melting cheese, grated.
  • Butter at room temperature
  • Optional: Mustard, chutney or savory jam; other fillings such as arugula, bacon, tomato, etc.

Directions

  1. Heat a skillet to a steady low heat.
  2. Butter 4 pieces of sliced bread on one side. Add optional condiment on two of these if you’d like.
  3. Place 2 slices in the hot pan. Cover each with grated cheese and any other ingredients you’d like, then another piece of buttered bread.
  4. Cook until one side is brown. Flip and heat the other side.
  5. Cut them any way you’d like. I prefer triangles when using standard white bread because it provides more surface crunch.

Pakoras: Indian spiced vegetable fritters

When a girl in Delhi, the author would splash away madly during monsoon season. Only these could lure her indoors

  • more
    • All Share Services

Pakoras: Indian spiced vegetable fritters

The much-awaited monsoon rain showers are always a cause for celebration in India. When the rains finally arrived in Delhi, as a kid I remember rushing outdoors with my sisters, fully clothed, jumping for joy and singing out loud, trying to catch the first raindrops on our tongues. Kids here have songs to make the rain go away; we had chants to entice the clouds to shower more rain.

After the scorching heat of the dry summer and the almost daily onslaught of the dust-laden winds from the neighboring western desert, nothing was more welcome than the torrential downpour that signaled the start of the monsoon season. The dry, parched land soaked up the first raindrops eagerly, scenting the air with a heady, earthy aroma. Flowers bloomed again, adding to the fragrance. If you were lucky, you might be able to hear the call of the peacocks, and maybe even see a male unfurl the full splendor of its iridescent plumage, dancing in the rain for a mate.

Needless to say, we’d get soaking wet in no time at all. Eventually, we’d be coaxed inside with promises of pakoras, savory fritters made with a chickpea flour batter, and some ginger-cardamom chai. It takes great willpower to just have one or two pakoras; what usually starts off as a snack turns into a meal, ending with improvised sandwiches of bread slathered with mint-cilantro chutney and filled with the remaining pakoras. These fritters are not only good for a rainy day, but make a great snack any day, any time.

For lunch today, my family and I indulged in pakoras as we watched the liquid Oregon sunshine through the windows. With a hot cup of ginger chai tea, it was the perfect Sunday indulgence.

Here is a simple recipe to try. To make it easier, I’ve made many spices optional. No need to fret if you don’t have them all on hand. The chickpea flour is available in many ethnic stores.

Pakoras: Indian-style fritters

Serves 6-8

Ingredients

For the batter

  • 1½ cups fine chickpea flour (also known as besan/garbanzo flour/gram flour; available at many Asian markets)
  • Salt, to taste
  • Cayenne pepper, to taste
  • 1 teaspoon cumin powder
  • 3-4 tablespoons finely chopped cilantro or parsley
  • ½ cup to 1 cup of warm water
  • A pinch of baking soda
  • Optional spices, one or more of the following if used: a pinch of asafetida powder, ½ teaspoon turmeric powder, 2 teaspoon caraway seeds (ajwain) or 2 teaspoons nigella seeds (kalonji), 1 teaspoon dried pomegranate seed powder or 1 teaspoon dried unripe mango powder (amchoor)

For the fritters

  • (Use any of the following, per your choice and availability)
  • 1 medium potato, washed, scrubbed and cut into thin, round slices
  • 1 or 2 Japanese eggplants, cut into wedges, or into round disks
  • 1 cup of broccoli and cauliflower florets, cut into 1-to-2-inch pieces
  • ½ block of store-bought paneer cheese, cut into small cubes or long pieces, about ½-inch thick
  • 1 medium onion, peeled and cut into disks
  • 1 small, thin zucchini squash, cut into ½-inch disks
  • A handful of fresh spinach leaves
  • 1 sweet pepper or a few hot peppers, cut into large chunks or round disks
  • Peanut or vegetable oil, as needed, for frying

Directions

For the batter

  1. Place all the dry ingredients in a deep mixing bowl and stir well.
  2. Add the chopped cilantro and the optional spices. Slowly add ¼ cup of the warm water, mixing well with a fork or a whisk.
  3. Beat the batter to get a smooth consistency. Remove all lumps.
  4. Add additional water as needed to get the consistency you want. (Note: I make my batter very thin and runny, because I like a very light coating of batter on my fritters. If you are new to this, I suggest using less water and keeping your batter thick. A thick batter is easier to handle.)
  5. Whisk well for a few minutes, then let rest for at least 30 minutes while you prep the vegetables and heat the oil.

For the fritters

  1. Pour oil into the wok, saucepan or fryer. You need a depth of at least 1-2 inches, and several inches of clearance above the oil to be safe from bubbling over. Heat on low while you finish prepping the vegetables.
  2. Put the sliced potatoes and eggplant in a bowl of cold, salted water for 10-15 minutes. Drain and pat dry before frying.
  3. Salt the onion rings, mixing in the salt with your fingertips and set aside for 10-15 minutes. Pat dry before frying.
  4. When ready to start frying, turn the heat up and heat the oil to 350°F. To test if the oil is hot enough, you can also take a little batter on your fingertip and let it drop carefully into the oil. If it rises immediately, the oil is hot enough. Turn the heat down to a medium.
  5. Put a few of the vegetables into the batter and stir. Working with one piece at a time (I use one hand to do this, and the other hand to fry), coat well with the batter and carefully lower into the hot oil. If using spinach leaves, hold each leaf by the stem tip as you coat with batter.
  6. Fry on medium heat, turning a few times, till very light golden. Remove carefully from the hot oil and drain on absorbent paper towels.
  7. Repeat the process till all the vegetables and paneer cheese pieces are used up.
  8. When ready to serve, heat the oil again and fry the pakoras in batches a second time in hot oil till they are a golden brown all over. The second frying really crisps up the pakoras. Serve hot, with a sauce of your choice. I used a bit of mint-cilantro sauce stirred into some plain yogurt today.

Notes:

  • Please use caution when frying and working with hot oil, taking care not to splash or drop the food from a height into the oil. Instead lower it in carefully, as close to the surface of the oil as possible.
  • You may need to play with the temperature of the oil by turning the heat up or down a few times during the frying process. You want the fritters to bubble on contact with the oil, but not fry dark brown too quickly.
  • To reheat, place in a single layer on a cookie sheet and bake in a preheated 350°F oven for 10 to 15 minutes. They will crisp up again very nicely.
  • Any leftover batter will keep in the refrigerator for a few days. 
Continue Reading Close

Spaghetti alla carbonara

Born in the kitchens of Roman charcoal workers, this rich pasta dish packs a powerful, "almost primal" punch

  • more
    • All Share Services

Spaghetti alla carbonara

The food of Rome is the gustatory reflection of a city whose history encompasses the glory of an empire and the squalor of a tiny provincial backwater, the excesses of Caligula and the holiness of saints, the refinement of court cuisine and the simple, earthy cookery of pilgrims and the poor. It’s almost shockingly powerful, almost primal, revolving around organ meats, garlic, black pepper, juniper berries, sausage, pork and cheese. Eating a Roman meal is like experiencing an earthquake or an orgasm or Mardi Gras.

In my mind, no dish better encapsulates the experience of Roman cuisine than Spaghetti alla Carbonara — the Roman charcoal industry’s gift to the world. As the story I’ve been told goes, the charcoal sellers lived in the towns in the hills of Lazio outside Rome, cutting wood and charring it before carrying it in sacks down to the city to sell. The work was almost unbearably physical, and demanded hearty food to keep up one’s energy — hence, the birth of this almost unbearably rich pasta dish.

How much of that is truth and how much the product of the Roman love for poetic fabrication I don’t know, but whatever its history, it’s my favorite meal on Earth, a marker of important events in the same way that others use champagne or cigars. When served, conversation around the table ceases, replaced by moans and grunting. It’s a pleasure too good to ever be called guilty.

A note on ingredients: I call for pancetta, an air-cured Italian pork belly that’s a cousin to bacon. I love its chewy sweet-saltiness, but most Romans would insist that you use guanciale, cured pork cheek, whose soft, buttery unctuousness produces a different texture and effect. Pancetta is widely available, usually presliced in thin sheet; I prefer to buy it from an artisan salumi producer that sells it in a cylindrical roll that allows me to cut it into small dice. Guanciale is less widely available. Both can be bought online from Boccalone, a San Francisco artisan salumeria, and in well-stocked Italian markets.

Also, this recipe uses minimally cooked eggs. All the usual caveats apply; I recommend sourcing eggs from responsible producers that are unlikely to have salmonella problems, but if you’re worried about uncooked eggs, this may not be the recipe for you.

Spaghetti alla Carbonara

*Mise en place is essential for this recipe. Have everything prepared before you start!

Ingredients

  • 6 ounces pancetta or guanciale, cut into ¼-inch dice
  • 1 tablespoon olive oil
  • 2 whole eggs plus 3 egg yolks, beaten together with ¼ cup water
  • ½ cup freshly grated pecorino romano (a hard, salty goat cheese)
  • ½ cup freshly grated Parmigiano-Reggiano
  • 1 teaspoon coarsely ground black pepper
  • 1 pound good-quality spaghetti — splurge for the good stuff, and look for a rough, textured surface; the sauce will adhere better.

Directions

  1. Heat the oil in a high-sided skillet over medium heat and gently cook the pancetta/guanciale until the fat has fully rendered and the meat is just barely crisp but still chewy. Don’t fry it until it’s completely crisp! If the pancetta is done before the pasta, set it aside. DO NOT drain the rendered fat under any circumstances.
  2. Cook the pasta until al dente, reserving a small amount of the cooking water.
  3. Just before you drain the pasta, take a big sip of wine, and make sure you’ve got two pasta forks or other implements for tossing pasta quickly. If you took the pancetta off the heat early, put it back on the burner and heat it up so the fat is bubbling, then take it off the heat again and put it on a cutting board or other heatproof surface.
  4. Now, everything happens very fast; you’re relying on the latent heat of the pasta and pancetta to cook the sauce. Drain the pasta in a colander and dump it into the skillet at once, while it’s still hot; dump the cheese and pepper on top of that, and pour the beaten eggs over the whole mess — one, two, three, very fast! Then, immediately, toss that pasta like you’ve never tossed before. You want the eggs to mix with the cheese and coat the pasta smoothly, not hit the hot fat at the bottom and turn into globs of scrambled eggs. This is where I usually drop stuff and create lots of drama.
  5. Serve immediately, just as soon as the eggs set on the pasta, in warmed pasta bowls, passing extra cheese and pepper as desired — this recipe quickly congeals when cold, so scream “Mangia! Mangia!” at anybody inclined to linger over their salad. Sit back, drink wine, and enjoy the chorus of quiet, deeply moved profanity and moaning.

Quick Reference Steps:

  1. Sauté pancetta until just crisp but slightly chewy. Meanwhile, cook pasta until al dente.
  2. Heat up pancetta if taken off heat, drain pasta.
  3. Dump pasta, cheese, egg mixture, pepper into skillet and toss with hot pancetta.
  4. Serve immediately.
Continue Reading Close

Cauliflower, cheddar and prosciutto gratin

How to punish and pleasure a vegetable: Bake it with sauce and pork into brown, toasty, tasty submission

  • more
    • All Share Services

Cauliflower, cheddar and prosciutto gratin

To me, pouring a cheese sauce over fresh vegetables makes as much sense as putting Cheese Whiz on filet mignon. But sometimes cauliflower wants a little company, and the addition of a cheddar cream sauce and crispy proscuitto is just the perfect compliment to an already beautiful vegetable.

Cauliflower Gratin

Ingredients

  • 1 head of cauliflower cut into oversize florets
  • 2 slices of prosciutto, diced
  • 2 cups of hot milk
  • 3 cups of very sharp shredded cheddar cheese
  • 1 cup of grated parmesan
  • 2 tablespoons butter
  • 3 tablespoons of flour
  • 2 teaspoons of olive oil

Directions

  1. Preheat oven to 350 degrees.
  2. Blanch the cauliflower in salted, boiling water for 4 minutes, drain and place into an ice bath to keep it from continuing to cook. Let the cauliflower drain in a colander while making the sauce.
  3. Melt the butter over medium-high heat in a large saucepan, add the flour and stir for one minute. Add the hot milk and stir with a whisk to break up any lumps. Add the cheddar while constantly stirring the sauce until all of the cheese is incorporated. Remove from heat.
  4. Sauté the prosciutto and olive oil in a frying pan over medium heat. Stir constantly until it becomes crispy, but don’t take your eyes off of it; it will burn in a nanosecond if it’s left unattended.
  5. Add the prosciutto to the cheese sauce and pour over the cauliflower in an ovenproof dish.
  6. Cover the cheese sauce with the grated parmesan, and bake covered for 20 minutes and uncovered for another 20 minutes.
Continue Reading Close

Saint Teresa’s egg yolks

An egg-heavy confection straight out of the convent

  • more
    • All Share Services

Saint Teresa's egg yolks

Cholesterol in the Lee clan has always been — as Homer Simpson famously said of alcohol — the cause of, and the solution to, all of life’s problems.

“You really shouldn’t eat so much fat,” Mom lectured one morning when I was visiting over Christmas. “That’s why your blood pressure so high.”

She told me this as I poured myself a bowl of granola and she prepared a breakfast of fried eggs and Spam for Dad.

We all know, of course, that food doesn’t have to be fattening to be wonderful. We love the custardy, string-free mangos that sometime pop up, for a mere 50 cents apiece, in Chinatown. We always look forward to the peppery salads made with the greens Mom grows in big pots on the back patio.

Still, some of the things nearest and dearest to our hearts and stomachs are not to be spoken of in the presence of respectable people — and the element of danger only increases their appeal. You’ll have to pry our pork belly sliders from our cold, dead (no doubt from congestive heart failure) hands.

Even Mom, the most vocal worrywart in the family, is not immune to the allure of fatty treats. Every so often over the years, she’d wax rhapsodic about the baroque, egg-laden Portuguese sweets she grew up with in Macau, which was at that time a Portuguese protectorate. I was intrigued by her descriptions of them and by the fact that none of these treats seemed to have a name, at least not that she could remember. One of these, she said, consisted of “tiny strands of egg yolk cooked in sugar, like a little birds’ nest”; another was “a ball of egg yolk that has crunchy sugar on the outside but is creamy when you bite into it”. How could these mysterious wonders not have names?

Later, my curiosity grew with the realization that I’d never seen anything resembling those confections anywhere — and I’ve been fortunate enough to live in places where one can track down just about any ethnic cuisine imaginable. Another reason for my fascination with those treats is that they are made almost entirely of egg yolks. Eggs in themselves, Mom liked to warn, should be eaten only in moderation. But the mystery sweets of her youth not only contained eggs, but only the bad, dangerous, cholesterol-bearing part of the egg, in lethal concentrations. And yet Mom liked to reminisce about those eggy sweets, and would no doubt eat one in a heartbeat if we somehow managed to conjure them up.

Then, last week, she called me, excited by a recent discovery. While browsing an online store featuring Spanish imports, she came across something that looked strikingly familiar — tiny, round convent sweets made of egg yolks, an artisanal specialty made for hundreds of years by an order of Spanish nuns in the walled medieval town of Avila. The description said they were crunchy with sugar on the outside with insides that dissolved on the tongue “without any pressure.”

Bingo. Or as close to “bingo” as we could hope to get: Spain and Portugal are neighboring countries with many shared food traditions, including an obsession with cramming as many egg yolks as possible into the dessert course. (There is a practical historical reason for this: Wine-makers in both countries required large quantities of egg whites to clarify wine, and the nuns used egg whites to starch their habits; hence, a steady supply of egg yolks was ready and waiting to be made into convent sweets.) The resulting cholesterol bombs became so beloved they spread around the world with the Spanish and Portuguese diaspora, evolving as they traveled. Local variants of Iberian egg sweets can be found in locales as far flung as the Philippines, Brazil — and Macau.

And Mom swore those pricey Spanish sweets from that online catalogue looked and sounded exactly like the ones she remembered from Macau. But no way was she going to pay to have those things airlifted in an insulated box from Spain to Los Angeles.

But, she said hopefully, there were recipes for it online, and they sounded pretty simple. I had myself a project.

The recipes I found for this confection, officially called yemas de Santa Teresa (literally “Saint Teresa’s egg yolks,” aka “the cause of, and solution to, all of life’s problems”), all take the same basic form: make a sugar syrup, mix it with an appalling number of egg yolks, cool the resulting mixture, form it into little balls, then roll the balls in sugar. Some recipes boast only three ingredients: egg yolks, sugar and water. Others enhance the syrup with lemon zest and/or cinnamon. I like the idea of a hit of spice and citrus to offset all that sweetness and richness; it adds to the mysterious medieval vibe of the confections and makes them feel both more and less pointlessly decadent.

I’ve always hated the term “sinful” when applied to food. It seems to reflect the worst aspects of Puritanism (free will and the Puritan work ethic I can get behind; the idea that life must be miserable to be virtuous, not so much). Besides, how could these little treats be sinful? They were invented by nuns. And sold by nuns to support their work. Ergo, those who eat them are doing God’s work.

Given these truths, how could they possibly be bad for you?

The following recipe is a combination of several nearly identical recipes I found online from different sources. Almost all of the credible-looking recipes came from websites based in Spain, which made me glad to have functional Spanish reading skills and a digital scale that allows metric measurements. I’ve converted the measurements to standard American measures.

YEMAS DE SANTA TERESA

Ingredients

  • 8 egg yolks
  • ½ cup sugar
  • 1/3 cup plus 2 teaspoons water
  • ½ stick cinnamon
  • zest of 2/3 lemon
  • Additional sugar for coating

Directions

  1. Beat the egg yolks, then pass them through a fine-meshed strainer into a heat-proof bowl.
  2. Combine the remaining ingredients in a small, heavy saucepan. Bring to a boil over medium heat and cook until the syrup reaches the soft-ball stage (There are two easy ways to tell: If you use a candy thermometer, this stage is between 235 and 240 degrees F. The low-tech way to test for readiness is to drop a small amount of the syrup into a bowl of ice water. If the syrup is ready, it will form a soft little ball that you can easily pick up and press flat between your fingers; if it’s not ready yet, it will dissolve in the water).
  3. Remove the cinnamon stick and lemon zest from the syrup, then gradually whisk the syrup into the egg yolks.
  4. Return the syrup and egg mixture to the saucepan. Cook over medium heat, whisking constantly, until the mixture thickens and starts to pull away from the sides of the pan.
  5. Put the mixture in a clean container and refrigerate until firm.
  6. Roll the cooled mixture into walnut-size balls and roll the balls in sugar.
  7. If you want to be fancy, put the balls in frilly little paper cups for serving.
Continue Reading Close

Hawaiian-inspired French toast with coconut syrup

Take one part doughnut, one part coconut, add sweet bread and spiced batter ... and have a vacation at breakfast

  • more
    • All Share Services

Hawaiian-inspired French toast with coconut syrup

What would be your last wish on your final morning in Hawaii? Catch the sunrise? A last-minute dip into the Pacific? Or perhaps one last exploration of tide pools, looking for crabs, starfish and sea turtles?

After a glorious week in the sun, while the rest of us were still asleep to the hypnotic sounds of waves, the breeze gently blowing through palm trees, and the lazy whir of the ceiling fan, my husband woke up quietly to sneak out for his one last wish. He drove 45 minutes (each way) to get a dozen malasadas. That’s the kind of guy he is.

Malasadas are the yeasty, eggy, sugary doughnuts that were introduced to the Hawaiian islands by Portuguese immigrants from the Azores generations ago. Eagerly incorporated into the cuisine of the Hawaiian islands, each island has a “best” place to get them. On the Big Island, that place is Tex Drive In, in Honokaa, near Waimea.

To the casual observer, the malasada looks like a typical raised doughnut, rolled in granulated sugar. Stace, one of the kama’aina (locals) I talked to, shed some light on what makes Tex’s malasada special: the first owners converted their recipe for pao doce (Portuguese sweet bread) and used it to make their mouth-watering and award-winning malasadas.

My husband arrived back with the box of malasadas just as the rest of us were waking up, and we quickly devoured them. That’s how you can eat on vacation — without consequences.

Back home, I wanted to make a Sunday brunch to remind us of Hawaii, which we miss too much already, but I don’t do much deep-frying in my kitchen. Thinking back to Stace, Tex’s malasadas, and the Portuguese immigrants who brought their sweet bread and malasadas to another heavenly island home, I made a not-too-guilty replacement: Portuguese sweet bread French toast with coconut syrup.

Portuguese-Hawaiian sweet bread French toast with coconut syrup

Sweet bread makes excellent French toast because of its eggy, light and slightly chewy texture. I made this version with guava- and taro-flavored sweet bread we brought back with us from Punalu’u Bake Shop, which by being located 30 minutes South of Hawaii Volcanoes National Park in Na’alehu is known as the “Southernmost Bakery in the U.S.A.” King’s Hawaiian bread or rolls, readily available in all major grocers on the mainland, make a great substitution. Hawaiian coconut syrup is more difficult to come by, so I’ve made a recipe you can make from ingredients easily found anywhere.

Ingredients

For coconut syrup

  • 1 can (13- or 14-ounce) unsweetened coconut milk
  • 1 cup simple syrup (made of equal amounts of granulated white sugar and water, boiled together)
  • pinch of salt

For French toast

  • 1 pound loaf of Hawaiian sweet bread (or rolls), such as King’s Hawaiian
  • 5 large eggs
  • ¼ cup milk
  • 1 teaspoon vanilla extract
  • ½ teaspoon ground cinnamon
  • zest of a lemon, lime or tangerine
  • butter, as needed for griddle or pan

Directions

For coconut syrup

  1. Whisk together coconut milk, simple syrup and salt in a saucepan, and bring to a gentle boil over medium heat. Stir occasionally to prevent scorching.
  2. The syrup is ready when boiled, but you can reduce to desired thickness by continuing to cook over low heat, stirring frequently.

For French toast

  1. Slice sweet bread into desired size slices.
  2. Whisk together eggs, milk and seasonings.
  3. Heat griddle or pan to medium-high and grease with a small amount of butter.
  4. Dip slices of sweet bread into egg mixture, then cook on griddle for a minute or so on each side, until nicely golden.
  5. Serve with coconut syrup and a dusting of powdered sugar.
Continue Reading Close

Page 1 of 43 in Kitchen Challenge