Ingredients
- The bread: Cutty’s uses a black pepper brioche roll, but any good-quality soft roll will work. Toast it. And if it’s not brioche, toast and lightly butter it. The size is important here; a 4-inch diameter will let the meat mound up nicely. (But sometimes things aren’t perfect. “It’s artisan, handmade bread,” Chuck says. “That’s what they’ll tell you when they fuck up the shape of the bread.”)
- The spread: Use your favorite Thousand Island dressing, and stir in prepared horseradish to taste, enough to give it a noticeable, but still pleasant, flare. Chuck says: “The one time I was in the Thousand Islands, I was actually at a restaurant eating Thousand Island dressing. No lie! And they had a little horseradish in it. Roast beef and horseradish have always been natural, so I added some more horseradish to the dressing to make the spread for this sandwich; little memories like these are what let food ideas come together in your head.”
- The cheese: Sharp cheddar, thinly sliced
- Crispy shallots: You can buy these at Southeast Asian grocery stores, but they’re fresher and livelier when you make them. And if you’re going to bother to make them, make a bunch; they freeze well and are delicious sprinkled on nearly anything. Eight large shallots will give you about ½ cup fried, enough for about 6 sandwiches. But you might eat half of them before the sandwiches are ready.
- Roast Beef: Cutty’s uses great quality beef, but a relatively inexpensive cut: the chuck eye roll. It’s traditionally more often used for stewing and braising, but when you salt it overnight, slice it very thin, and slow-roast it, the toughness disappears and you have incredibly beefy-tasting meat. (These instructions assume a roughly 5-pound roast, tied for even shape. Ask the butcher to tie it for you, and cooking times are always approximate anyway — use a meat thermometer and keep an eye on the oven.)
Directions
For the shallots
- The key with the shallots is to slice them 1/8 of an inch. Too thin and they burn before they evaporate all their moisture and crisp, too thick and they fry up a little leathery. They don’t need to be perfectly uniform, but if you have the patience, a mandolin slicer will give you even cuts all the way through.
- Dry the shallots out by laying the slices in one layer on a towel-lined baking sheet for an hour or two. (This step is optional, but gives you a bigger margin for error while frying, since most of the frying time is spent evaporating the moisture from the shallots anyway.)
- To fry, use canola or another neutral-flavored vegetable oil, about twice the volume of sliced shallots, meaning if you have 1 cup of shallots, use 2 cups of oil. Combine the shallots and room-temperature oil in a saucepan or pot that leaves you with plenty of room, and set them over a high flame. Bring the oil to a fierce frying bubble, then turn it down, maybe to a medium-low flame. Watch for the bubble action here and adjust the heat accordingly; you want a brisk simmer — not a wild deep fry, and not a lazy bubble. Stir often. They take a while, at least 15 minutes, longer if you’re doing a larger batch. Keep an eye on them: They’ll be a stringy, kind of melty mass, but will eventually start to puff up and get “fluffy,” turning a nice golden brown.
- Take them out when they’re fluffy-looking and almost rust-colored, and drain on lots of paper towel. Spread them out so they’re not sitting in a big pile; as close to one layer as is reasonable. They won’t be crisp yet; that comes as they cool, but they will be as sweet as hell. “Every time I taste them I can’t believe how sweet they are. And when I leave the cover off the oil, I can smell it when I open the door in the morning,” Chuck says. “Because everything else in the sandwich is so well-seasoned, I don’t season these with salt. But they’re good when you do.” And keep the oil; it’s delicious drizzled over noodles, on rice, whatever.
For the beef
- Salt the meat: Salting the meat overnight does wonders. First, the salt tastes good, and giving it time lets it work its way deep into the roast. Then, it unwinds the proteins in the meat, making them less rigid and more tender. Use kosher salt, which is less dense, and less salty, than table salt. I’ll let Chuck take it from here: “I just kinda go crazy with the salt, up to 2 or 3 tablespoons per roast. Don’t, like, pack it in salt, but sprinkle enough all over the meat so it looks like a light snow on your beef. Someone’s going to walk in and be like, ‘Whoa, that’s a lot of salt!’ and you can yell back, ‘It’s called flavor, you asshole!'” Rub it in, get it to stick as much as possible, and put it in a shallow baking dish to catch the juices. Cover it with plastic wrap and put it in the fridge overnight.
- Dry the meat: “The next day, pat the beef very dry with paper towels, and put it on a roasting pan. You can roast straight from the fridge; it’s almost better that way. Preheat your oven to 475 degrees. I do mine at 500, but 500’s kind of an irresponsible number to tell people. At that level, most people’s ovens are like, ‘Fuck, you want me to turn it up, I’ll turn it up!’ and they go crazy. 475 is adequate. You’re just trying to kick-start the browning process.”
- Get cooking: Roast the beef, and check on it at about 30 minutes. It should be lightly browned — not a deep, crusty brown, but a nice, overall, light brown. If not, let it ride for a bit longer. Take it out, turn the oven down to 300, flip the roast over, and put it back in the oven. It’s important not to put it cut side down, where the roast is tied together. If you roast it sitting on the cut side, it tends to overcook.
- Start checking in 45 minutes to see where you are, with a thermometer in the middle of the roast. Aim for 135 degrees. It can take another 45 minutes, it can take another 90; it really just depends on your oven. But what you should have by the end is a dark brown crust with 135 in the center.
- Let it rest: When the beef comes out of the oven, let it sit for at least 45 minutes.
- Slice: Ideally, use a machine slicer for very thin cuts; not paper thin, but just thick enough so they still hold together, not falling apart. If you’re slicing by hand, just do it as thin as you can. This really helps with the tenderness.
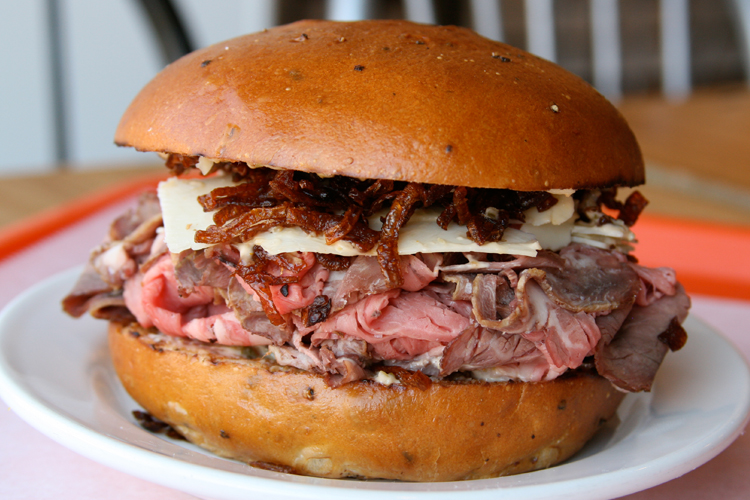
- Assemble the sandwich: Dress the toasted bun on both sides. Add ¼ pound of beef, a slice of cheese, and a nice sprinkle of shallots.
