Dreams of flying speak to your ambition. If you dream of ghosts, you fear death. But what does it mean if the dream that haunts you and leaves you in a tearful sweat of panic every night is about … fruit tarts?
In the Worst Dream Ever, I’m walking through a large open-air market. The market looks exactly like the touristy Farmers’ Market at Third and Fairfax in Los Angeles, with one difference: Instead of endless stalls featuring oranges, T-shirts and miniature California license plates onto which you can have your name printed, the market in my dream sells nothing but pastries — beautiful, elegant, glazed little confections in every imaginable shape, each glowing with jewel-like fruit, glossy ganache, or delicate filigrees of caramel or icing. Every one of them looks and smells more fantastic and fragrant and mouth-watering than the last, and I long for them all.
But since this is the Worst Dream Ever, I’m running through that market empty-handed in a crazed frenzy of panic and indecision: I have no idea which treat to choose, but I know there is some horrible, unspoken penalty for choosing badly. The clock is running down; for some mysterious reason, I only have a few minutes in that market and have to leave almost as soon as I arrive, and I’m paralyzed by self-doubt. Or stupidity. Or something. And in the Worst Dream Ever, I always have to leave that marvelous world of sweets without tasting anything.
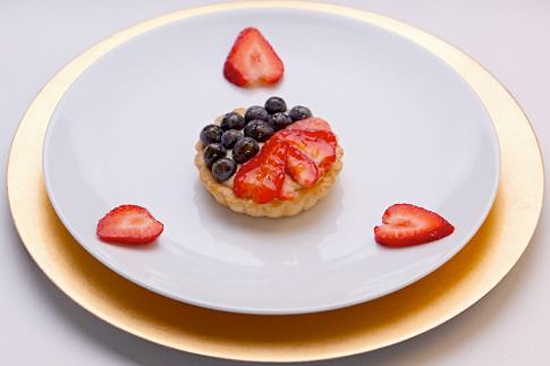
Among the treats that tempt me the most in the Worst Dream Ever are glossy tartlets filled with custard and topped with glistening mosaics of glazed fresh fruit. These tarts have haunted my waking dreams since forever. In grade school, I thought they represented culinary alchemy: They looked amazing, and yet they were covered with fruit. Fruit! Back then, that word automatically brought to mind abstemious little boxes of raisins or slices of apple that adults tried to pass off as dessert if there was no ice cream left. But those tarts magically turned oh-so-good-for-you fruit into something worthy of an extended nagging campaign.
But in my waking life, just as in my dream, the magic of those fruit tarts remained out of reach.
“They look better than they taste,” my parents warned me whenever I begged for one. And on the rare occasions they indulged me, I had to admit they were right: They almost all had tough crusts, lumpy or runny filling, and sour, hard fruit. My early attempts to make them myself weren’t much more successful.
Only when I got to cooking school many years later did I figure out how to make fruit tarts taste as good as they look. There are a few secrets:
Perfect fruit tarts require perfect fruit. Since the fruit on classic fruit tarts isn’t cooked and is a huge part of the final taste profile, it must not only look great, but taste great on its own. If it’s not sweet and ripe enough to eat straight off the tree (or, more realistically, straight out of the fridge), it doesn’t belong on a fruit tart.
Pastry cream is your friend. Pastry cream, which forms the creamy filling of the tarts I learned in cooking school, is a thick, flavorful and eminently well-behaved custard stabilized with flour or corn starch. It’s the only classic French custard that can (and must) be boiled. Because it’s meant by design to withstand high cooking temperatures, as long as you stir it constantly while you cook it and don’t do anything too crazy, it’s unlikely to separate or curdle or otherwise disappoint you the way more fragile custards can. I can’t remember what I was putting in my fruit tarts before I learned about pastry cream, but whatever it was, I’m not going back.
Chocolate! Just about every fruit tart recipe warns you to serve the darn things immediately after assembling them or face the wrath of God (and your guests). This is because the moment the custard filling hits the crust, the previously crispy crust starts to moisten and toughen, and the moment the fruit touches the custard, it starts to release its juices and shrivel up while simultaneously making the custard runny. Yum.
This could be why the tarts I ate as a child were such a disappointment: They were probably fine when first assembled early in the morning, but by the time I got my greedy little paws on them just before dinnertime, they were well past their prime.
There are a few sneaky tricks, however, to extending the fleeting lifespan of fruit tarts. If you choose self-contained fruits such as blueberries, the sagging/leaking fruit problem (temporarily) goes away. In cooking school, I learned a particularly lovely trick for avoiding soggy crusts: line the cooked tart shells with a thin layer of melted semisweet chocolate and allow it to harden before addding the pastry cream. The chocolate forms a protective barrier against the moisture of the filling. Problem solved, and the addition of chocolate makes the tart of my dreams — at its Platonic ideal, a luscious combination of buttery pastry, creamy custard and sweet/tangy summer fruit — even better.
I haven’t had the Worst Dream Ever in years. But now I know that at least one of the elusive sweets in that dream will always be in reach, for the price of some good seasonal fruit and a little elbow grease. It comforts me to think these two facts are directly related.
And I never did figure out what that dream was supposed to mean.
The fruit tart of my nightmares
Preparation notes: This recipe is not nearly as complicated as the following writeup suggests: The filling and dough for the tart shells can be done ahead of time, and the end results will be well worth the trouble. Leftover tarts may not be quite so ethereal the morning after, but they still make a killer summer breakfast.
Ingredients
Tart shells
- 3 cups cake flour
- 1 ½ teaspoons salt
- 1 ½ teaspoons sugar
- 6 ounces (1 ½ sticks) unsalted butter, chilled
- 2 eggs
- 4 teaspoons water
- ¼ teaspoon vanilla
- 1 ½ finely grated lemon zest
- 1/3 cup semisweet chocolate chips
Pastry cream
- 2 cups milk
- ½ vanilla bean OR
- 1 teaspoon vanilla extract
- 4 tablespoons sugar, divided
- 5 egg yolks
- 3 tablespoons corn starch
- 1 tablespoon unsweetened butter
Fruit
- Amounts vary depending on the size of the tart or tarts you are making, your choice of fruit, and how generously you want to decorate your tart. Do not use any fruit that browns easily when cut (such as apples or pears), nor any that release huge amounts of juice when cut (such as oranges), nor those not sweet enough to be eaten alone (such as cranberries). Good choices include blueberries, strawberries, raspberries, pineapple and kiwis.
Glaze
- ½ cup apricot jam
- 6 tablespoons water
Directions
Tart shells
- Combine the flour, sugar and salt in a large mixing bowl.
- Cut the butter into small cubes, add to the flour, and rub the butter into the flour with your fingers until the mixture forms lumps the size of small peas.
- Combine the remaining ingredients in another bowl, then add them to the flour and butter mixture.
- Toss the mixture lightly until just combined. Pour the mixture onto a floured surface and knead lightly until everything is uniformly combined. Do not overwork.
- Shape the dough into a flat rectangle, wrap in plastic, and chill for at least half an hour before shaping.
- When the dough is chilled, divide it into portions to line your tart molds: Each portion should be enough to form an even ¼-inch layer on the bottom and sides of each mold; exact amounts will depend on the size of the molds. Roll out each portion to fit the mold; press firmly onto the bottom and sides of each mold. Put the dough-lined molds in the freezer to harden for at least half an hour before baking.
- Place the now-frozen tart shells in their molds on a baking sheet; prick the tart shells several times with a fork, and bake in a preheated 400 degree oven until lightly browned.
- Line the baked shells with chocolate. Lazy way: When the shells come out of the oven, immediately put into each enough chocolate chips to cover just under 2/3 of the bottom of each shell. When the chocolate has softened (about 3 minutes), spread it over the bottom and halfway up the sides of the shells with a small offset spatula. Fancy way: Wait until the shells have cooled completely. Then, melt the chocolate gently over a water bath; once the chocolate has completely melted, use a small offset spatula to spread into each shell just enough of the chocolate to coat the bottom and lower part of the sides completely. In either case, make sure the chocolate has completely cooled and hardened before adding the filling.
- In principle, the lazy method runs the risk of trapping steam in the shells, causing them to toughen. But the tart shells I’ve made this way have still turned out pleasantly flaky.
Pastry cream
- Put the milk and half the sugar into a small saucepan. Scrape the insides of the vanilla bean (if using) into the milk; add the scraped bean to the milk as well. Cook over medium heat until it steams.
- In a large mixing bowl, whisk together the egg yolks, remaining sugar, corn starch and vanilla extract (if using).
- When milk is hot, pour a about ¼ cup into the egg mixture and whisk until combined. Gradually add the rest of the milk while whisking continuously.
- Pour the mixture back into the saucepan and return to heat. Cook over medium-high heat, whisking continuously, until the mixture is thick and starts to bubble. Be mindful to hit the corners of the saucepan consistently when whisking; the mixture will start to thicken and cook there first.
- When the mixture is thick enough that the tracks of a whisk pulled through it stay in place, take it off the heat and pour it into a mixing bowl. Add the butter and whisk until the butter is fully melted and incorporated.
- Put the mixing bowl into a larger bowl filled with ice cubes and continue whisking until the mixture is cool. Store the finished pastry cream in a covered container until you’re ready to assemble the tarts.
Glaze
- Combine the jam and water in a small saucepan; whisk together over low heat until combined. Pass mixture through a strainer. Return the glaze to the saucepan and keep over low heat until ready to use.
Assembly
- Using a pastry bag or a spoon, fill each tart shell with an even layer of pastry cream.
- Now the fun part: top the pastry cream with cut fruit or whole small berries in any decorative pattern you wish.
- Gently dab warm glaze over the fruit with a clean pastry brush.
- Enjoy the tarts, and serious bragging rights, as soon after assembly as possible. If not serving the tarts immediately, store them covered in the refrigerator.
