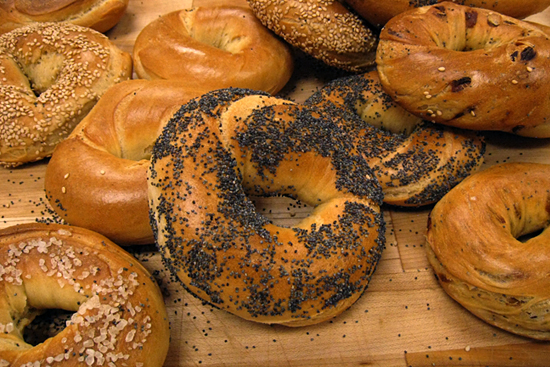
Just because something is round and made of bread doesn’t make it a bagel. I should know; I grew up among true bagel eaters. Also, I am Chinese, and since all my Jewish friends accord the cuisine of my people the utmost respect, it’s only right that I fight for the honor of their bread. A true bagel is not the size of a saucer. It is not puffy. It should have an actual, distinct hole. It must have a crust you have to actively try to tear apart, and it has to be chewy, a workout for your jaw (in a good way). On the matter of the inclusion of cinnamon and raisins, I am officially against. (Unofficially, I eat them like doughnuts. Shh.)
But the world does not respect the integrity of the bagel. Nay, the ubiquity of the sucky bagel can no longer be ignored: big, puffy, dry, characterless, insipid, stupid, ignorant, offensive, socially maladjusted circle-shaped breads called bagels exist in every supermarket freezer aisle, in every corner deli. They besmirch the bagel’s good name.
Happily, my baker friend Shelby once set his mind to creating the very best bagel he could, and because this is a man who once drove across the entire country without a radio in his car because he set his mind to it, he came up with a killer recipe, full of firm chew, a crust with self-respect, and a subtly sweet, wheaty flavor. Even more happily, these bagels also represent a fine lesson in key baking skills, so even if you’re not going to join the bagel resistance, they’re still worth making to learn techniques in mixing, kneading, proofing and baking. (If you know all this stuff, feel free to skip to the recipe, but it was all news to me.)
What is a straight dough, and the best kind of yeast to buy: While the soda bread we learned about last time is a chemically raised quick bread, bagels are in the straight dough family, which is to say doughs that are leavened through the use of commercial yeast. One of the reasons I’ve always avoided bread making is having to deal with proofing yeast, activating it with water that’s warm but not too hot, so they come alive but are not killed by the heat. It all seemed a hassle. Happily, instant yeast (aka bread machine yeast, quick yeast or yeast with some reference to its speed) is made so that it dissolves quickly and works fine in cold and room-temperature water, so there’s no need to fuss with a thermometer.
Standard mixing technique: In the recipe below, you’ll see that the dry and liquid ingredients, minus the flour and the salt, are mixed together first. Then you add half the flour and mix some more, then the rest of it with the salt. This is the standard technique for mixing together doughs, and it works nicely because it allows for the dry and wet ingredients to mix and dissolve evenly before the thirsty flour shows up and hogs all the water. Adding half the flour at a time also allows for more even hydration of the flour, and it also provides the yeast with a bit of protection from the salt, which scares poor yeast to death. (Salt actually does slow down yeast’s activity, which is important in all kinds of ways for bread.)
Kneading stiffer doughs: People develop their own moves for kneading dough, but the three things to keep in mind are that you want to keep stretching, folding and rotating the dough. It’s really not about pressing into it hard or beating it up. The technique Shelby taught me, which works really nicely for this and other doughs that aren’t super wet or sticky, is to stand at the table with one foot slightly forward. In this stance, you can rock your body weight back and forth to give you force and rhythm and keep your arms from tiring out. Using your body weight, push forward on the dough with the heels of your hands, pushing it down into the table only as firmly as you need to make sure it’s stretching the dough forward somewhat. Then, as you rock back, use one hand to pick up the top of the dough to fold or roll it down back over itself. Use your other hand to give it a quarter turn at the same time, so that your next push forward into the dough is in the same location and direction on the table, but you’re effectively working a different area of the dough itself.
Retarding: Fermentation in the dough, which is what gives us rising, happens slowly when the room is cool and quickly when it’s warm. Knowing this, it’s possible to prepare a dough up to almost any stage and put it on hold until you’re ready to come back to it by putting it in the fridge, which will nearly stop the fermentation process. This is called retarding. (Just make sure you cover the dough with plastic so it doesn’t dry out.) The recipe below is great to make all the way to the point where you’re ready to boil and bake the bagels, pop the dough the fridge overnight, and have them ready to cook fresh for breakfast. (OK, probably it’ll be more like brunch.)
The importance of the baking stone: One of the two major differences in professional and home ovens is that the big boys get much hotter and stay hotter; they don’t lose all their heat when the door is opened, making the baking process wonky at home. (Even a quickish peek into a home oven can cost you 50 degrees.) But a good-quality baking stone (also called a pizza stone) can go a long way toward equalizing the two if you let it preheat for a good long time; it slowly builds up heat in itself, and so even if the hot air escapes your oven, it will “donate” its heat to rewarm the air much more quickly. And its intense heat helps give breads baked directly on it a great crust. Put your stone on the bottom rack of the oven (not the floor of the oven), and just make sure you get a nice thick one, ¾ of an inch or so; the thinner ones you get for about $20 have a nasty habit of cracking.
True, honorable bagels
Recipe courtesy of and adapted from Shelby Kibler and Zingerman’s Bakehouse
Makes 16
Ingredients
- 2¾ cups water
- ¼ cup plus 1 tablespoon barley malt
- 1 tablespoon Demerara (sugar in the raw)
- 1 teaspoon instant yeast
- 8¼ cups King Arthur brand all-purpose flour; if you don’t have that brand, use another brand of bread flour
- 1 tablespoon salt
Directions
- In a large mixing bowl, add the water, barley malt, Demerara and yeast and stir together with a wooden spoon. Add half the flour and mix to incorporate the ingredients. This should be a thick batter, and don’t worry about lumps.
- Add the remaining flour and salt and incorporate the ingredients together until the dough is a “shaggy mass,” bakers’ terminology for a dough that’s starting to come together but has loose and dry bits falling off it and looks a bit like a rock star’s head.
- Empty the bowl onto a clean, dry work surface. Don’t worry about loose flour and partially mixed bits, these will work in as you knead the dough — what you’re actually doing in the initial stages of kneading is forcing the water to move through the flour itself, hydrating the dry particles hiding among the moistened ones.
- Once the dough is evenly hydrated, knead the dough for 8 to 10 minutes. It’s a pretty stiff dough, so this is going to be a workout. No one said joining the bagel resistance would be easy! Put on some music you like and don’t forget to rock (as in back and forth, not like guitar-bass-drums, though that is always recommended).
- At the end of 8 to 10minutes, if your dough is nice and smooth and elastic, form it into a ball and put it in into a container that’s sprayed with nonstick spray or lightly oiled. Cover with plastic wrap and let it ferment for 1 hour at room temperature (70-ish degrees).
- If you’d like to bake the bagels as soon as they’re ready (as opposed to retarding them in the fridge for the morning, etc.), preheat your oven now to 475 with the baking stone — the stone needs to sit in the 475 oven for an hour to be ready.
- After an hour, have a large sheet of plastic ready (a cut-open grocery bag works great; plastic wrap is too clingy). Divide the dough into 16 pieces (I like to quarter the ball and then cut each quarter into 4 wedges) and set aside covered with plastic.
- Take the thinner end of a wedge of dough and fold it in on itself, so the wedge becomes rectangular. Roll it out on the table, starting with one hand in the middle, joining with the other hand, and rolling it outward. Roll it into a cylinder 8 to 10 inches long, leaving the ends a bit bulgier than the rest. Apparently the word “bagel” is related to the word “bangle.” So now you’ll give the name some meaning and bejewel yourself with it. Hang a dough strand over your hand, in the crook of your thumb, so that one of the bulging end is in your palm. Wrap the strand around your hand, and overlap the other end by 2 inches, so you have a wad of dough in your palm. Put your hand on the board and firmly roll the two ends together, joining them into a circle. Place under the plastic and repeat with the rest. Look! You’re making bagels!
- When the bagels are all shaped, place them on a lightly floured board or tray, cover loosely with plastic wrap, and let them ferment for 1 hour. (Once they’ve fermented, this is a great point to put them in the fridge until the next morning if you’d like to serve them fresh for breakfast. Just make sure you preheat the oven in step 6 above.)
- Bring a big pot of water to a boil, then turn down to a simmer. Boil a few bagels at a time, taking them out of the water with a slotted spoon about 10 seconds after they float (this should only take a few seconds). Place the boiled bagels on a tray until they’re all ready. (If you’d like toppings like poppy or sesame seeds or coarse salt, set up some bowls filled with them and dip the wet bagels into them.)
- Assuming you don’t have the traditional jute-fabric baking boards, set the bagels on a lightly oiled sheet tray and bake the tray directly on the baking stone for 21 to 25 minutes or until golden brown. (If you do have the jute boards, I’m going to assume you know how to use them, fancy-pants!) Remove from the oven and cool completely on a cooling rack.
These bagels are really at their best within the first couple of hours after they’ve cooled, and they’ll remain good for 6 to 8 hours or so. After that, they’re better toasted or put in the freezer.
