I can’t do Thanksgiving without some really good rolls on the table. Since the season is just about upon us, I tackled the concept in the most recent episode of Bake it Up a Notch, diving deep into all things dinner rolls and learning a lot along the way! This year, on top of all of the recipes (and there are many!), I wanted to share all of my favorite tips, tricks, and techniques for baking all kinds of beautiful dinner rolls. So right in time for fall and holiday baking, here are my seven top secrets for perfect dinner rolls, every time.
1. Pick the right dough for crusty vs. fluffy results
Dinner rolls can be made from either lean or enriched bread doughs. Enriched doughs are recipes that contain “enrichments” like butter, eggs, milk, and sugar. Examples of enriched doughs include brioche, challah, and Parker House rolls. Lean doughs contain no enrichments — they are just made of flour, water, yeast, and salt. Examples of lean doughs include baguettes, ciabatta, and plain varieties of sourdough. When choosing your ideal roll recipe, remember: If you’re looking for a fluffier roll, opt for an enriched dough. For a crustier roll, choose a lean dough.
2. Don’t put away the scale after mixing
I’m always gabbing about how much I love my kitchen scale. It’s the most accurate form of measurement, and will help yield the most consistent results, every single time you bake. This is especially important in bread baking, where I keep the scale on my work counter after I’m done measuring out my ingredients. After the dough rises, I weigh it, and divide the weight by the recipe’s yield. I use the resulting number to weigh out each portion of dough to ensure it’s evenly divided, and each roll is exactly the same size. Call me a perfectionist if you wish, but it only takes a little extra time, and ensures that the rolls bake evenly, too!
3. Know exactly what a “lightly floured surface” means
When it comes time to shape the dough, a lot of recipes direct you to handle your dough on a “lightly floured surface” — but what exactly does that mean? As a recipe writer, to me this term sort of just means: Use as much flour as you need so things don’t stick, but no more. See, every dough is a little different, and they will require a lot more flour than others. Some doughs, like ciabatta, are highly hydrated and therefore may require significant flour when shaping. Enriched doughs can also sometimes be sticky or tacky, which can make them a little more difficult to shape and thus will need a bit more flour than leaner doughs.
Here’s my rule of thumb: Use flour as needed to keep your dough from sticking to your work surface, hands, or rolling pin. Measure this a little bit at a time, adding more if needed. But don’t be throwing it around too generously, as using flour in excess can actually make the dough more difficult to shape.
4. Hack any dough recipe to make it ahead
The rolls my mom makes for Thanksgiving every year have the added benefit of being an overnight dough. She lets the dough rise overnight, and on the big day she bakes them first thing before the turkey goes in the oven. I’ve come to really rely on this tactic for meals outside of Thanksgiving; and really, if you’re hoping to make rolls to serve alongside a large meal of any sort, it can be convenient to be able to make the dough ahead. Beyond convenience, a slow-rising dough benefits from gaining a lot of lovely flavor. Most doughs can be adjusted to rise overnight with a few simple adjustments.
- Instead of using warm liquid (water, milk, etc.) at the temperature the recipe suggests, use room-temperature liquid (about 70°F/21°C).
- After mixing, allow the dough to rise at room temperature for the time called for in the recipe, then transfer the dough to the refrigerator for up to 12 hours.
- Allow the dough to rest at room temperature for 30 minutes before beginning shaping.
5. Proof your dough perfectly
Proofing, or rising the dough, occurs at two stages: after mixing and after shaping. During this fermentation time, the yeast consumes carbohydrates; this releases carbon dioxide gasses in the process, which causes the dough to rise. In addition to physically rising during proofing, dough gains strength and flavor, too. Proper proofing is essential to achieving the proper crumb structure in the final rolls. The best way to determine if rolls are properly proofed are cues like visible puffiness, or the “poke test.” Use a finger to gently poke the surface of the roll.
- Under-proofed dough will not hold an indentation — it will quickly spring back.
- Properly proofed dough will hold a slight indentation, and slowly spring back (though not entirely).
- Over-proofed dough will hold the indentation and not spring back.
Remember, enriched doughs typically rise slower than lean doughs. The higher the quantity of enriched ingredients (like milk, eggs, sugar, and butter), the slower the rise will go. This can be deceptive, so be sure to trust visual and tactile cues (like the poke test) over time cues.
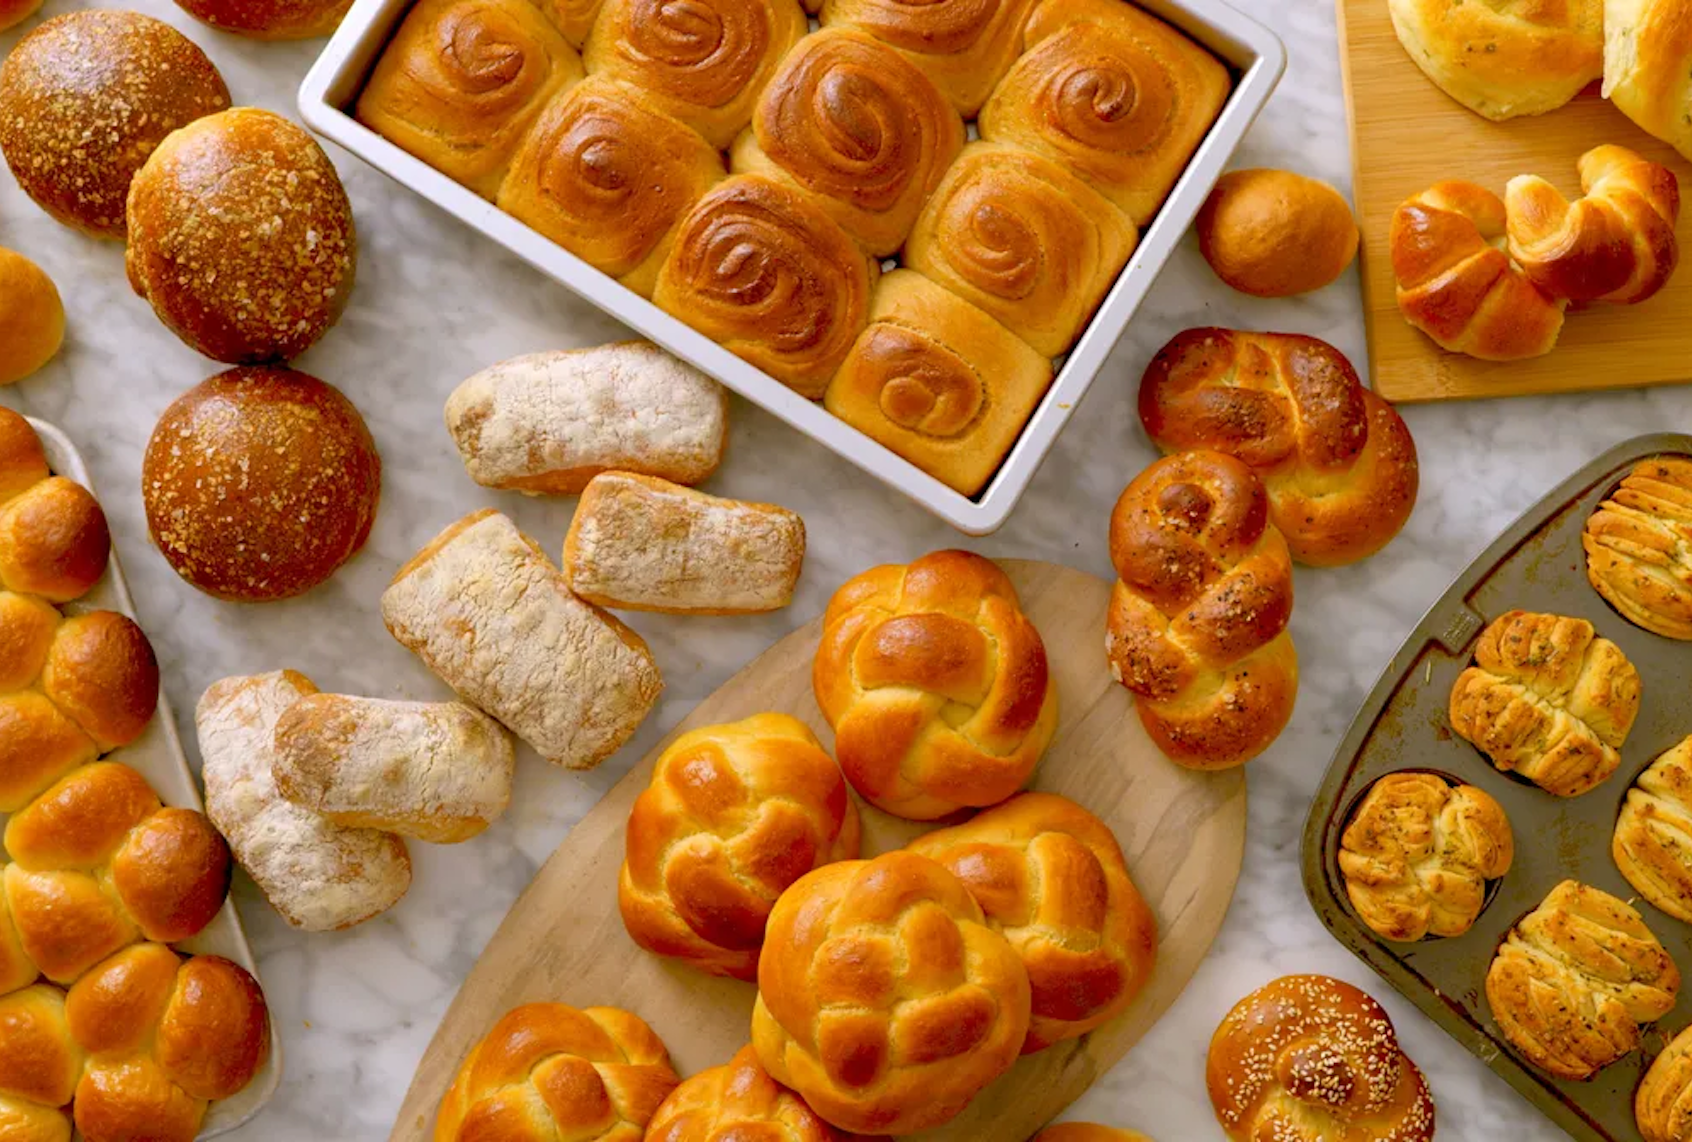
6. Think beyond the round roll
I love a classic round roll, but there are so many more ways to make beautiful shapes with roll dough. Be sure to check out the newest episode of “Bake it Up a Notch,” where we show how to shape each of these shapes step-by-step! Here’s some of my favorite roll shapes:
- Split-top or clover rolls: Instead of just rounding one piece of dough per roll, use two smaller rounds (split top) or three rounds (clover rolls).
- Folded rolls (Parker House or lotus leaf-style): In this preparation, the dough is rolled into a flattened oval, then the dough is folded over onto itself. For classic Parker House rolls, the dough is brushed with butter before it’s folded.
- Knotted rolls: In this method, the portioned dough is formed into a long strand, then “tying” it into a knot shape.
- Braided rolls: Here, the dough is divided into either single or multiple portions, each are rolled into long strands, then woven into braided shapes.
- Crescent rolls: The same method used for shaping croissants can be used to make very cute little rolls.
- Pull-apart, fan, or accordion rolls: Methods that can be used for pull-apart loaves also work well for rolls. Usually pull-apart rolls are baked in a muffin pan to contain the pieces of dough, so that the rise and bake together in a neat roll shape.
7. Get ’em golden brown, once and for all
Rolls can be finished in a variety of ways to promote even browning, or even add flavorful finishes to the exterior. Here are a few ideas that I like to keep in mind as I’m getting ready to bake these puppies.
- Scoring: Scoring the rolls with a lame, sharp blade, or scissors can provide decorative marks and/or create a designated spot for steam to escape during baking. This is most commonly done on lean dough rolls.
- Egg wash: Either egg yolk (to aid in browning), egg white (to add shine), or whole egg wash (for both) can be brushed onto the surface of proofed rolls before baking. I mix the egg with a tablespoon or so of water to help it achieve a brushable consistency.
- Butter basting: Rolls can be brushed with butter before, during, or after baking. While it doesn’t brown the surface as much as egg wash will, it does promote browning and adds a lot of flavor.
- Garnishes and toppers: I love to finish my rolls with ingredients like flaky salt, sesame seeds, poppy seeds, caraway seeds, black pepper, and cheese can be added to the surface after proofing and before baking. Egg wash or water can help these garnishes better stick to the surface before and after baking.
